ATCC ATCC Logo 0
  • Quick Order
  • Careers
  • Support

ATCC Primary Cell Culture Guide

Purple, red and black human umbilical vein endothelial cells.

Time-tested tips and techniques for culturing primary cells

Download a printer-friendly version of the ATCC Primary Cell Culture Guide

Download PDF

ATCC Primary Cell Solutions

Guide to culturing human primary cells

Primary cells and cell types

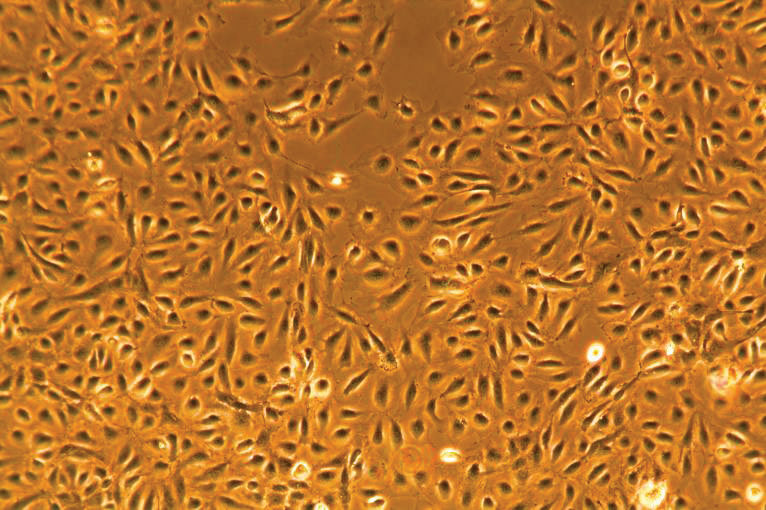
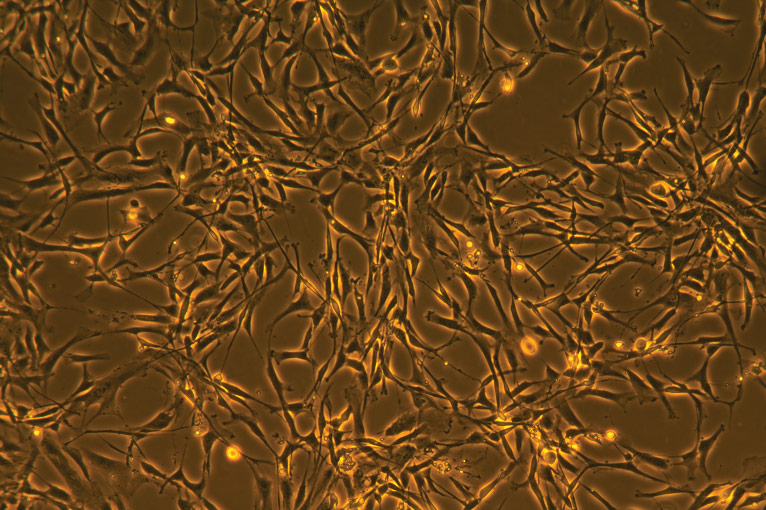
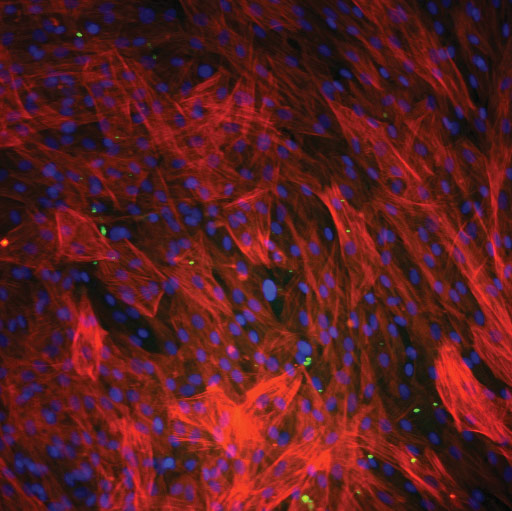
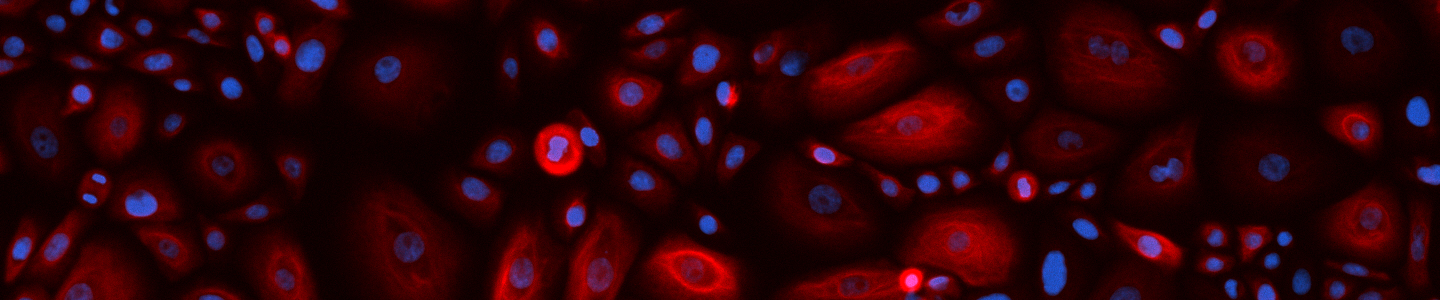
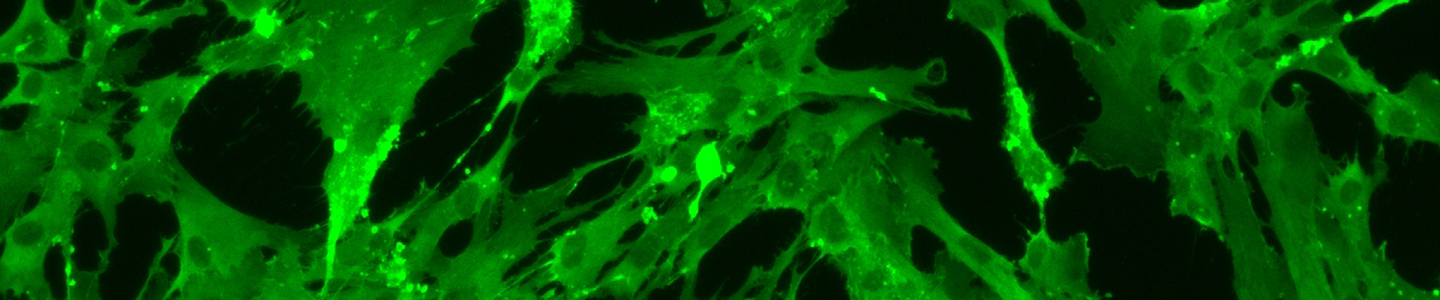
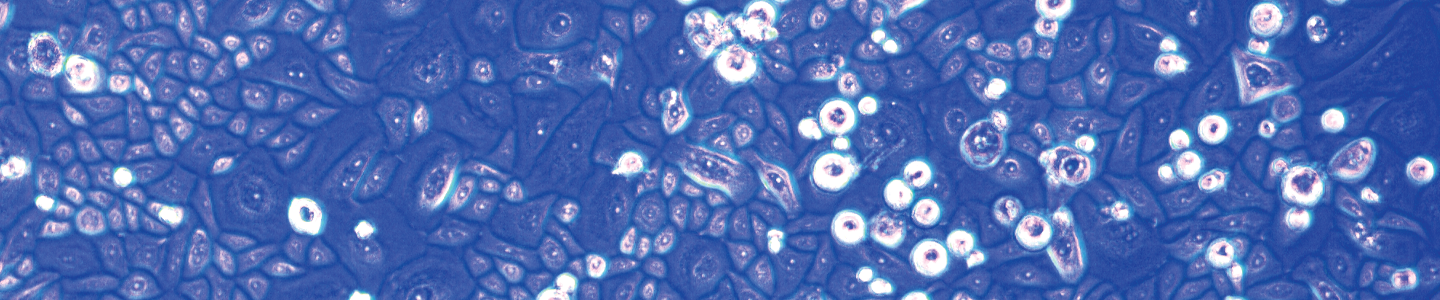
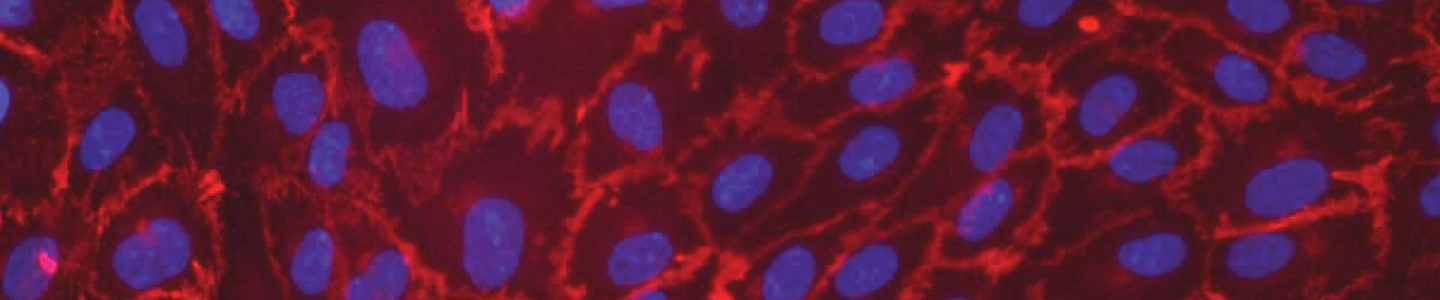
Primary cell cultures more closely mimic the physiological state of cells in vivo and generate more relevant data representing living systems. Primary cultures consist of cells that have been freshly derived from a living organism and are maintained for growth in vitro. Primary cells can be categorized according to the genus from which they are isolated, as well as by species or tissue type. Each mammalian tissue type is derived from the embryonic germ layer consisting of ectoderm, endoderm and mesoderm, which differentiate into the many cell types that organize into tertiary structures such as skin, muscle, internal organs, bone and cartilage, the nervous system, blood and blood vessels.1 The cell types most frequently found in primary cell culture are epithelial cells, fibroblasts, keratinocytes, melanocytes, endothelial cells, muscle cells, hematopoietic and mesenchymal stem cells.

Basic properties of primary cells

Once adapted to in vitro culture conditions, primary cells undergo a limited, predetermined number of cell divisions before entering senescence. The number of times a primary cell culture can be passaged is minimal due to the Hayflick Limit, nutrient requirements and culture conditions, and the expertise by which they are manipulated and subcultured. In contrast, cell lines that have been immortalized by viral, hTERT, or tumorigenic transformation typically undergo unlimited cell division and have an infinite lifespan. And, unlike tumor cell lines cultured in medium containing 10% to 20% serum, primary cell cultures are fastidious, requiring optimized growth conditions, including the addition of tissue specific cytokines and growth factors for propagation in serum-free or low-serum growth media.

Benefits of primary cells

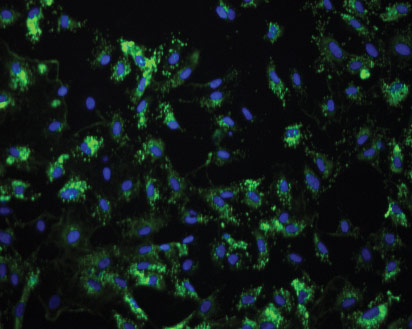
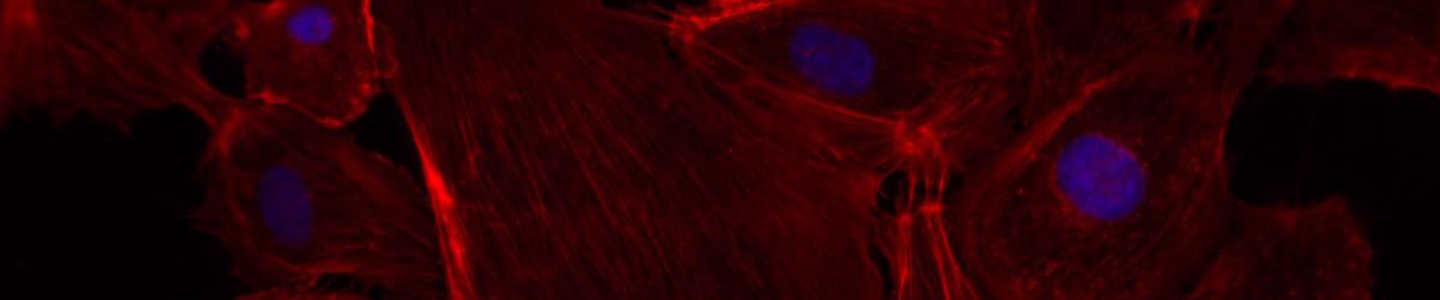
Primary cell cultures are commonly used as in vitro tools for preclinical and investigative biological research, such as studies of inter- and intracellular communication, developmental biology, and elucidation of disease mechanisms, such as cancer, Parkinson’s disease, and diabetes. Historically, investigators have employed immortalized cell lines in research related to tissue function; however, the use of cell lines containing gross mutations and chromosomal abnormalities provides poor indicators of normal cell phenotype and progression of early-stage disease. The use of primary cells, maintained for only short periods of time in vitro, now serves as the best representative of the main functional component of the tissue (in vivo) from which they are derived.

Isolation of primary cells

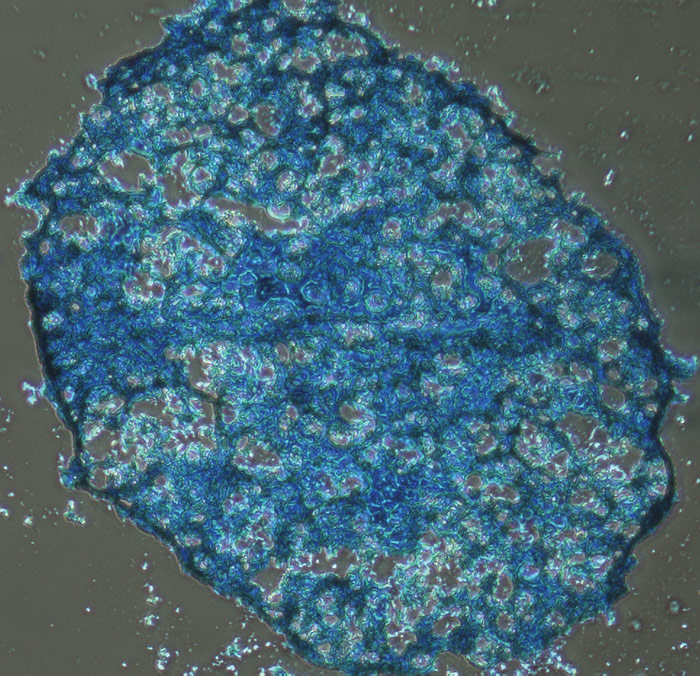
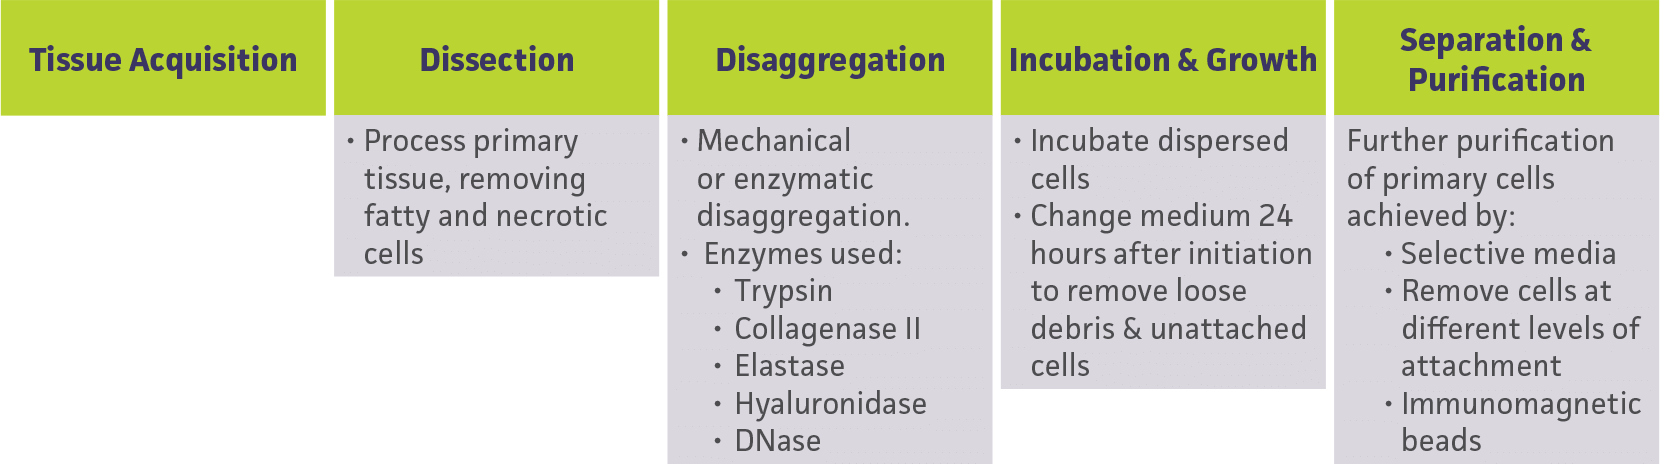
The isolation and purification of peripheral blood cells can be easily achieved by differential centrifugation or by positive sorting using magnetic beads. On the other hand, the isolation of a pure population of cells from primary tissue is often difficult to perform, and requires knowledge of how the cell strata should be teased apart into a suspension containing only one predominant cell type. Diagram 1 is an illustration of some of the basic steps used to establish a primary cell culture14.

Primary cell culture

Growth requirements

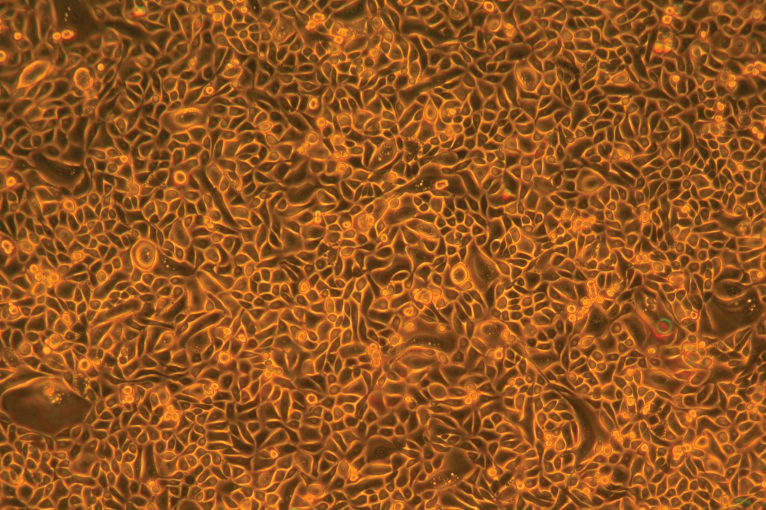
Primary cells, except for those derived from peripheral blood, are anchorage-dependent, adherent cells, meaning they require a surface in order to grow properly in vitro. In most cases, primary cells are cultured in a flat, uncoated, plastic vessel, but sometimes a microcarrier, which can greatly increase the surface area, can be used. A complete cell culture media, composed of a basal medium supplemented with appropriate growth factors and cytokines, is required. During establishment of primary cultures, it may be useful to include an antibiotic in the growth medium to inhibit contamination introduced from the host tissue. These may include a mixture of gentamicin, penicillin, streptomycin, and amphotericin B. However, long-term use of antibiotics is not advised, since some reagents, such as amphotericin B, may be toxic to cells over time.

Diagram 1: Basic steps used to isolate cells from primary tissue

Basic steps used to isolate cells from primary tissue

Maintenance

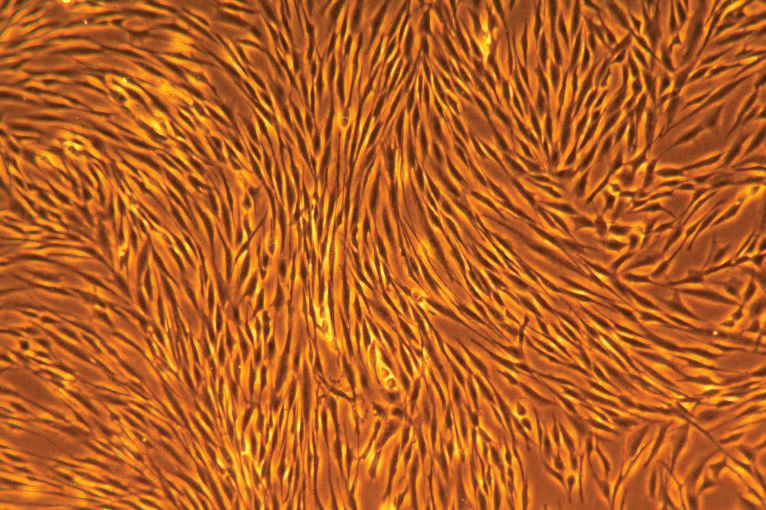
The maintenance phase begins when cells have attached to the surface of the culture dish. Attachment usually occurs about 24 hours after initiation of the culture. When initiating a culture of cryopreserved primary cells, it is important to remove the spent media once the cells have attached because DMSO is harmful to primary cells and may cause a drop in post-thaw viability. When cells have reached a desired percent of cellular confluence and are actively proliferating, it is time to subculture. It is best to subculture primary cell cultures before reaching 100% confluence, since post-confluent cells may undergo differentiation and exhibit slower proliferation after passaging.
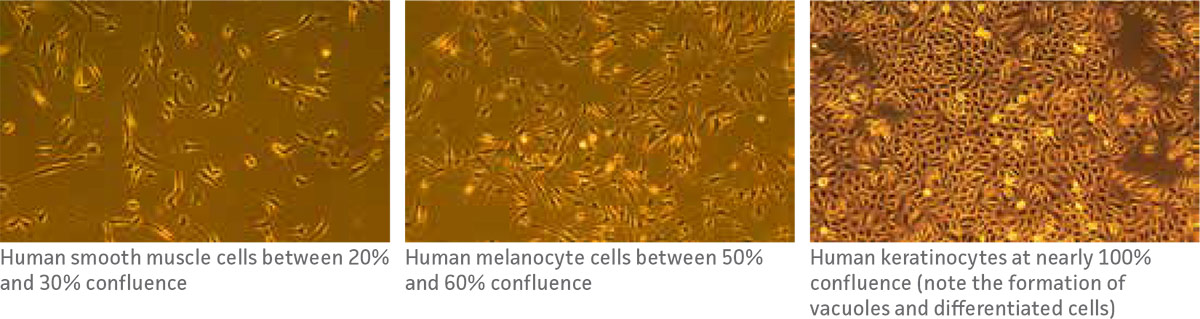
Cellular confluence

Cellular confluence refers to the percentage of the culture vessel inhabited by attached cells. For example, 100% cellular confluence means the surface area is completely covered by cells, while 50% confluence means roughly half of the surface is covered. It is an important parameter to track and assess in primary cell culture because different cell types require different confluence end points, at which point they need to be subcultured.

Levels of cellular confluence

Levels of cellular confluence

Subculture

Anchorage-dependent cells grow in monolayers and need to be subcultured at regular intervals to maintain exponential growth. Subculturing procedures, including recommended split-ratios and medium replenishment (feeding) schedules for each ATCC primary cell culture, are provided on the product information sheet provided with each cell (available at www.atcc.org). Subcultivation of monolayers involves the breakage of both inter- and intracellular cell-to-surface bonds. Most adherent primary cells require the digestion of their protein attachment bonds with a low concentration of a proteolytic enzyme such as trypsin/EDTA. After the cells have been dissociated and dispersed into a single-cell suspension, they are counted and diluted to the appropriate concentration and transferred to fresh culture vessels where they will reattach and divide.

Cell counting

Hemocytometers are commonly used to estimate cell number and determine cell viability with the aid of an exclusion dye such as Trypan Blue or Erythrosin B. A hemocytometer is a fairly thick glass slide with two counting chambers, one on each side. Each counting chamber has a mirrored surface with a 3 × 3 mm2 grid consisting of 9 counting squares. The chambers have raised sides that will hold a coverslip exactly 0.1 mm2 above the chamber floor. Each of the 9 counting squares holds a volume of 0.0001 mL. Alternatively, counting cells can also be achieved by using an automated cell counter, such as Vi-CELL.

For a detailed description of cell counting using a hemocytometer, refer to the ATCC Animal Cell Culture Guide.

Cryopreservation and recovery

Special attention is needed to cryopreserve and thaw primary cells in order to minimize cell damage and death during each process. Cryopreservation of human cells is best achieved with the use of a cryoprotectant, such as DMSO or glycerol. Most primary cell cultures can be cryopreserved in a mixture of 80% complete growth medium supplemented with 10% FBS and 10% DMSO. The freezing process should be slow, at a rate of -1°C per minute, to minimize the formation of ice crystals within the cells. Once frozen, cultures are stored in the vapor phase of liquid nitrogen, or below -130°C.

Additional information about freezing cells can be found in the ATCC Technical Document: Cryogenic Storage of Animal Cells.

Thawing cryopreserved cells is a rapid process and is accomplished by immersing frozen cells in a 37°C water bath for about 1 to 2 minutes. Care should be taken not to centrifuge primary cells upon thaw, since they are extremely sensitive to damage during recovery from cryopreservation. It is best to plate cells directly upon thaw, and allow cultures to attach for the first 24 hours before changing the medium to remove residual DMSO.

Challenges of primary cell isolation and culture

There are several challenges associated with the use of primary cells. One of the greatest hurdles primary cell culturists face is limited cell accessibility due to issues with donor tissue supply, difficulty with cell isolation/purification, quality assurance and consistency, and contamination risks. Data comparability is also a serious issue with primary cell use, and arises out of variability among reagents used and the procedures implemented by individual scientists and laboratories to isolate and culture primary cells. A comparison between primary cells and continuous cell lines is described in Table 1.

Table 1: Comparison between primary cells and continuous cell lines

Properties Primary cells Continuous cell lines
Life span and cell proliferation Finite; limited to a small number of cell doublings Infinite when handled properly
Consistency Variability exists between donors and preparations Minimal variability
Genetic integrity Retains in vivo tissue genetic makeup through cell doublings Subject to genetic drift as cells divide
Biological relevance More closely mimics the physiology of cells in vivo Relevance can drift over time as cells divide
Ease of use (freeze-thaw and use) Requires optimized culture conditions and careful handling Well established conditions and robust protocols exist
Time and expense to use More time and less abundance of cells Less time and more abundance of cells

ATCC Primary Cell Solutions

ATCC has provided a solution to help investigators overcome the high cost and inconsistency found in routine primary cell culture with the development of ATCC Primary Cell Solutions, a standardized cell culture system that includes high-quality cells, media, supplements, reagents, and protocols. ATCC Primary Cell Solutions focuses on providing researchers with superior quality from a trusted sourceeach lot of ATCC Primary Cell Solutions primary cells is:

Cryopreserved at early passage

  • ATCC Primary Cell Solutions primary cells are frozen at passages 1 through 3.
  • Early passage material ensures higher viability and optimal plating efficiency.

Performance tested

  • ATCC Primary Cell Solutions cells, media, kit supplements, and reagents are tested for optimal reliability.
  • Growth and morphology are assessed to ensure all components work synergistically.

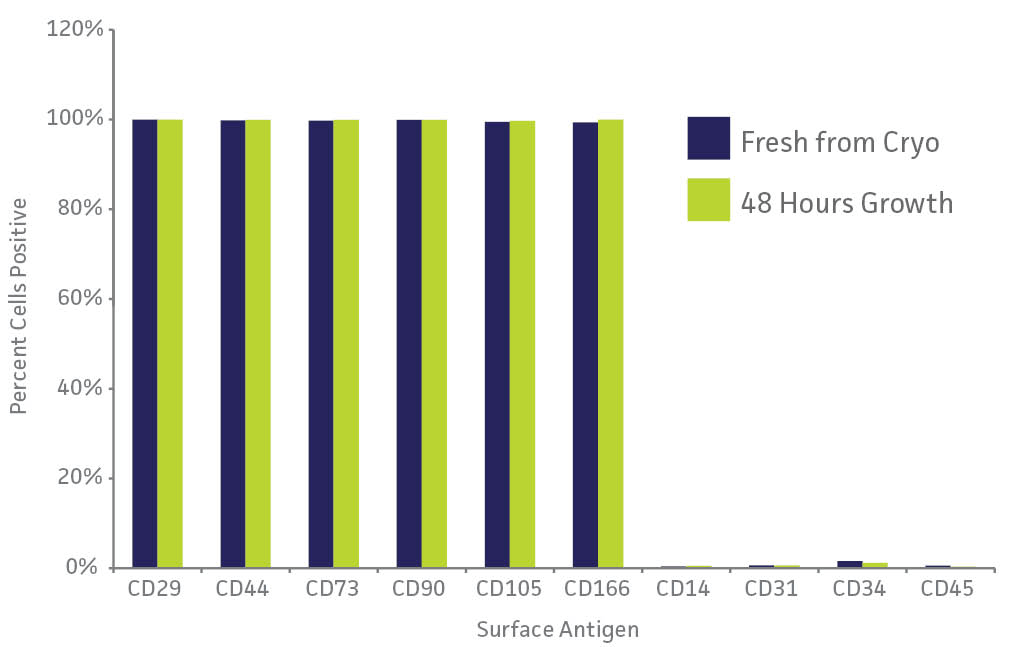
Quality controlled to ensure safety, purity, and functionality

  • Sterility testing – All cells are tested for bacteria, yeast, fungi, and Mycoplasma.
  • Viral testing – HIV-1, HIV-2, HBV, and HCV tissue screening is performed at isolation.
  • Viability and growth – Viability and growth of each lot of cells is checked before freezing and after-thawing.
  • Staining – Staining for cell-specific marker expression is determined and performed for some cell types.

ATCC Primary Cell Solutions basal media and cell-specific growth kits are designed to support recovery and proliferation of ATCC Primary Cell Solutions primary cells in vitro. Used as a system, ATCC Primary Cell Solutions primary cells, basal media, and cell-specific growth kits provide all the components needed to be successful in primary cell research. (Detailed formulations for each growth kit can be found at www.atcc.org.)

Short stacks of culture flasks and petri dishes containing red media.

ATCC Primary Human Endothelial Cell Solutions

Introduction

Small, orange and black Primary Dermal Microvascular Endothelial Cells.

Primary Dermal Microvascular Endothelial Cells; Normal, Human, Neonatal (HDMVECn) (ATCC PCS-110-010)

Endothelial cells form the endothelium – the thin layer of cells that line the interior surface of blood vessels forming a smooth anticoagulant surface that functions as a selective filter to regulate the passage of gases, fluid, immune cells, and various molecules.14 Human endothelial cells can be isolated from human umbilical vein, the aorta, the pulmonary and coronary arteries, and the skin, and serve as useful tools in the study of angiogenesis, cancer therapy, wound healing, burn therapy, high throughput and high-content screening projects, cell signaling studies, gene expression profiling, toxicology screening, tissue engineering, and regeneration.

ATCC Primary Human Endothelial Cells can be cultured in complete growth medium containing either bovine brain extract (BBE) or vascular endothelial growth factor (VEGF). Use of the Endothelial Cell Growth Kit-VEGF (ATCC PCS-100-041) will support a faster rate of proliferation, while the Endothelial Cell Growth Kit-BBE (ATCC PCS-100-040) is recommended if a less defined cell culture medium is desired.

Cell culture protocols

Materials needed

Table 2: Primary cells and complete growth medium

Endothelial cells Growth kit options* Basal medium
Umbilical Vein Endothelial Cells; Normal, Human (ATCC PCS-100-010) Endothelial Cell Growth Kit-BBE (ATCC PCS-100-040) or Endothelial Cell Growth Kit-VEGF (ATCC PCS-100-041) Vascular Cell Basal Medium (ATCC PCS-100-030)
Umbilical Vein Endothelial Cells; Normal, Human, Pooled (ATCC PCS-100-013) Endothelial Cell Growth Kit-BBE (ATCC PCS-100-040) or Endothelial Cell Growth Kit-VEGF (ATCC PCS-100-041) Vascular Cell Basal Medium (ATCC PCS-100-030)
Aortic Endothelial Cells; Normal, Human (ATCC PCS-100-011) Endothelial Cell Growth Kit-BBE (ATCC PCS-100-040) or Endothelial Cell Growth Kit-VEGF (ATCC PCS-100-041) Vascular Cell Basal Medium (ATCC PCS-100-030)
Coronary Artery Endothelial Cells; Normal, Human (ATCC PCS-100-020) Endothelial Cell Growth Kit-BBE (ATCC PCS-100-040) or Endothelial Cell Growth Kit-VEGF (ATCC PCS-100-041) Vascular Cell Basal Medium (ATCC PCS-100-030)
Pulmonary Artery Endothelial Cells; Normal, Human (ATCC PCS-100-022) Endothelial Cell Growth Kit-BBE (ATCC PCS-100-040) or Endothelial Cell Growth Kit-VEGF (ATCC PCS-100-041) Vascular Cell Basal Medium (ATCC PCS-100-030)
Dermal Microvascular Endothelial Cells; Normal, Human, Neonatal (ATCC PCS-110-010)

Microvascular Endothelial Cell Growth Kit-BBE (ATCC PCS-110-040) or Microvascular Endothelial Cell Growth Kit-VEGF (ATCC PCS-110-041)

Vascular Cell Basal Medium (ATCC PCS-100-030)
Reagents for subculture
D-PBS (ATCC 30-2200)
Trypsin-EDTA for Primary Cells (ATCC PCS-999-003)
Trypsin Neutralizing Solution (ATCC PCS-999-0004)

*Phenol red and antibiotics may be added, if desired, and are listed in Table 16 (PDF).

Preparation of complete growth media

  1. Obtain 1 growth kit from the freezer; make sure that the caps of all components are tight.
  2. Thaw the components of the growth kit just prior to adding them to the basal medium. It is necessary to warm the L-glutamine component in a 37°C water bath and shake to dissolve any precipitates prior to adding to the basal medium.
  3. Obtain 1 bottle of Vascular Cell Basal Medium from cold storage.
  4. Decontaminate the external surfaces of all growth kit component vials and the basal medium bottle by spraying them with 70% ethanol.
  5. Using aseptic technique, and working in a laminar flow hood or biosafety cabinet, transfer the volume of each growth kit component (volumes for each growth kit are provided on the product information sheet; the following table represents the Endothelial Cell Growth Kit-VEGF) to the bottle of basal medium using a separate sterile pipette for each transfer.
  6. Tightly cap the bottle of complete growth medium and swirl the contents gently to assure a homogeneous solution. Do not shake forcefully to avoid foaming. Label and date the bottle.
  7. Complete growth media should be stored in the dark at 2°C to 8°C (do not freeze). When stored under these conditions, complete growth media is stable for 30 days. Endothelial Cell Growth Kit-VEGF (ATCC PCS-100-041)

Table 3: Endothelial Cell Growth Kit-VEGF (ATCC PCS-100-041)

Component Volume Final concentration
rh VEGF 0.5 mL 5 ng/mL
rh EGF 0.5 mL 5 ng/mL
rh FGF basic 0.5 mL 5 ng/mL
rh IGF-1 0.5 mL 15 ng/mL
L-glutamine 25.mL 10mM
Heparin sulfate 0.5 mL 0.75 Units/mL
Hydrocortisone hemisuccinate 0.5 mL 1 μg/mL
Fetal Bovine Serum 10.0 mL 2%
Ascorbic acid 0.5 mL 50 μg/mL

Handling procedure for frozen cells and initiation of cultures

Blue-purple and green spots of Primary Dermal Microvascular Endothelial Cells

Primary Dermal Microvascular Endothelial Cells dual stained for von Willebrand factor (green) as a marker for endothelial cells and smooth muscle α-actin (red)

  1. Refer to the batch specific information provided on the last page of the product information sheet for the total number of viable cells recovered from each lot of ATCC Primary Human Endothelial Cells.
  2. Using the total number of viable cells, determine how much surface area can be inoculated to achieve an initial seeding density between 2,500 and 5,000 cells per cm2 for most Primary Human Endothelial Cells offered by ATCC; the exception being Primary Dermal Microvascular Endothelial Cells, which should be seeded at a density of 5,000 cells per cm2.
  3. Prepare the desired combination of flasks. Add 5 mL of complete growth media per 25 cm2 of surface area. Place the flasks in a 37°C, 5% CO2, humidified incubator and allow the media to pre-equilibrate to temperature and pH for 30 minutes prior to adding cells.
  4. While the culture flasks equilibrate, remove 1 vial of ATCC Primary Human Endothelial Cells from storage and thaw the cells by gentle agitation in a 37°C water bath. To reduce the possibility of contamination, keep the O-ring and cap out of the water. Thawing should be rapid (approximately 1 to 2 minutes).
  5. Remove the vial from the water bath as soon as the contents are thawed and decontaminate by dipping in or spraying with 70% ethanol. All operations from this point onward should be carried out under strict aseptic conditions.
  6. Add the appropriate volume of complete growth media [volume = (1 mL x number of flasks to be seeded) – 1 mL] into a sterile conical tube. Using a sterile pipette, transfer the cells from the cryovial to the conical tube. Gently pipette the cells to homogenize the suspension. Do not centrifuge.
  7. Transfer 1.0 mL of the cell suspension to each of the pre-equilibrated culture flasks prepared in steps 1 to 3 of Handling Procedure for Frozen Cells and Initiation of Cultures. Pipette several times, then cap and gently rock each flask to evenly distribute the cells.
  8. Place the seeded culture flasks in the incubator at 37°C with a 5% CO2 atmosphere. Incubate for at least 24 hours before processing the cells further.

Maintenance

  1. Before beginning, prewarm complete growth media in a 37°C water bath. This will take between 10 and 30 minutes, depending on the volume. If using a small volume of medium (50 mL or less), warm only the volume needed in a sterile conical tube. Avoid warming complete growth media multiple times.
  2. 24 hours after seeding, remove the cells from the incubator and view each flask under the microscope to determine percent cellular confluence.
  3. Carefully remove the spent media without disturbing the monolayer.
  4. Add 5 mL of fresh, prewarmed complete growth media per 25 cm2 of surface area and return the flasks to the incubator.
  5. After 24 to 48 hours, view each flask under the microscope to determine percent cellular confluence. If not ready to passage, repeat steps 3 and 4 as described above. When cultures have reached approximately 80% confluence, and are actively proliferating (many mitotic figures are visible), it is time to subculture. Subculture endothelial cells before reaching confluence; postconfluent primary endothelial cells may exhibit slower proliferation after passaging.

Subculture

  1. Passage Primary Human Endothelial Cells when cultures have reached approximately 80% confluence.
  2. Warm both the Trypsin-EDTA for Primary Cells (ATCC PCS-999-003) and the Trypsin Neutralizing Solution (ATCC PCS-999-004) to room temperature prior to dissociation. Warm complete growth medium to 37°C prior to use with the cells.
  3. For each flask, carefully aspirate the spent media without disturbing the monolayer.
  4. Rinse the cell layer two times with 3 to 5 mL D-PBS (ATCC 30-2200) to remove residual traces of serum.
  5. Add prewarmed trypsin-EDTA solution (1 to 2 mL for every 25 cm2) to each flask.
  6. Gently rock each flask to ensure complete coverage of the trypsin-EDTA solution over the cells, and then aspirate the excess fluid off of the monolayer.
  7. Observe the cells under the microscope. When the cells pull away from each other and round up (typically within 3 to 5 minutes), remove the flask from the microscope and gently tap it from several sides to promote detachment of the cells from the flask surface.
  8. When the majority of cells appear to have detached, quickly add an equal volume of Trypsin Neutralizing Solution (ATCC PCS-999-004) to each flask. Gently pipette or swirl the culture to ensure all of the trypsin-EDTA solution has been neutralized.
  9. Transfer the dissociated cells to a sterile centrifuge tube and set aside while processing any remaining cells in the flask.
  10. Add 3 to 5 mL D-PBS (ATCC 30-2200) to the flask to collect any additional cells that might have been left behind.
  11. Transfer the cell/D-PBS suspension to the centrifuge tube containing the trypsin-EDTA dissociated cells.
  12. Repeat steps 10 and 11 as needed until all cells have been collected from the flask.
  13. Centrifuge the cells at 150 x g for 3 to 5 minutes.
  14. Aspirate the neutralized dissociation solution from the cell pellet and resuspend the cells in 2 to 8 mL fresh, prewarmed, complete growth medium.
  15. Count the cells and seed new flasks at a density of 2,500 to 5,000 cells per cm2; however, be sure to seed Primary Dermal Microvascular Endothelial Cells at 5,000 cells per cm2.
  16. Place newly seeded flasks in a 37°C, 5% CO2, incubator for at least 24 to 48 hours before processing the cells further. Refer to Maintenance for guidelines on feeding.
Red and blue phalloidin human umbilical vein endothelial cells.

ATCC Primary Human Smooth Muscle Cell Solutions

Introduction

Primary Aortic Smooth Muscle Cells, Normal, Human

Primary Aortic Smooth Muscle Cells; Normal, Human (ATCC PCS-100-012)

Vascular tissue is made up of a diverse population of cell types, including endothelial cells, smooth muscle cells, pericytes, fibroblasts, and other connective tissue cell types. Together these cell types form tight junctions or connections, which allow for permeability for both passive and active transport across the vessel wall. Vascular smooth muscle cells make up the smooth muscle layer of blood vessels and can be co-cultured with vascular endothelium.14 Smooth muscle cells isolated from human ascending (thoracic) and descending (abdominal) aorta, coronary artery, and pulmonary artery are useful for studying vascular diseases such as thrombosis and atherosclerosis.

Cell culture protocols

Materials needed

Table 4: Primary cells and complete growth medium

Smooth muscle cells Growth kit options* Basal medium
Aortic Smooth Muscle Cells; Normal, Human (ATCC PCS-100-012) Vascular Smooth Muscle Cell Growth Kit (ATCC PCS-100-042) Vascular Cell Basal Medium (ATCC PCS-100-030)
Coronary Artery Smooth Muscle Cells; Normal, Human (ATCC PCS-100-021) Vascular Smooth Muscle Cell Growth Kit (ATCC PCS-100-042) Vascular Cell Basal Medium (ATCC PCS-100-030)
Pulmonary Artery Smooth Muscle Cells; Normal, Human (ATCC PCS-100-023) Vascular Smooth Muscle Cell Growth Kit (ATCC PCS-100-042) Vascular Cell Basal Medium (ATCC PCS-100-030)
Lung Smooth Muscle Cells; Normal, Human (PCS-130-010) Vascular Smooth Muscle Cell Growth Kit (ATCC PCS-100-042 Vascular Cell Basal Medium (ATCC PCS-100-030
Bronchial/Tracheal Smooth Muscle Cells; Normal, Human (PCS-130-011) Vascular Smooth Muscle Cell Growth Kit (ATCC PCS-100-042)
Vascular Cell Basal Medium (ATCC PCS-100-030
Bladder Smooth Muscle Cells; Normal, Human (PCS-420-012) Vascular Smooth Muscle Cell Growth Kit (ATCC PCS-100-042 Vascular Cell Basal Medium (ATCC PCS-100-030
Uterine Smooth Muscle Cells; Normal, Human (PCS-460-010) Vascular Smooth Muscle Cell Growth Kit (ATCC PCS-100-042)
Vascular Cell Basal Medium (ATCC PCS-100-030
Reagents for subculture
D-PBS (ATCC 30-2200)
Trypsin-EDTA for Primary Cells (ATCC PCS-999-003)
Trypsin Neutralizing Solution (ATCC PCS-999-004)    

*Phenol red and antibiotics may be added, if desired, and are listed in Table 16 (PDF).

Preparation of complete growth media

Red and purple aortic smooth muscle cells

ATCC Primary Cell Solutions aortic smooth muscle cells (ATCC PCS-100-012) dual stained for von Willebrand factor (green) as a marker for endothelial cells and smooth muscle α-actin (red) after differentiation.

  1. Obtain 1 growth kit from the freezer; make sure that the caps of all components are tight.
  2. Thaw the components of the growth kit just prior to adding them to the basal medium. It is necessary to warm the L-glutamine component in a 37°C water bath and shake to dissolve any precipitates prior to adding to the basal medium.
  3. Obtain 1 bottle of Vascular Cell Basal Medium from cold storage.
  4. Decontaminate the external surfaces of all growth kit component vials and the basal medium bottle by spraying them with 70% ethanol.
  5. Using aseptic technique, and working in a laminar flow hood or biosafety cabinet, transfer the volume of each growth kit component, as indicated in the following table to the bottle of basal medium using a separate sterile pipette for each transfer.

Table 5: Vascular Smooth Muscle Cell Growth Kit (ATCC PCS-100-042)

Component Volume Final concentration
rh FGF-basic 0.5 mL 5 ng/mL
rh Insulin 0.5 mL 5 μg/mL
Ascorbic acid 0.5 mL 50 μg/mL
L-glutamine 25.0 mL 10 mM
rh EGF 0.5 mL 5 ng/mL
Fetal Bovine Serum 25.0 mL 5%


  1. Tightly cap the bottle of complete growth medium and swirl the contents gently to assure a homogeneous solution. Do not shake forcefully to avoid foaming. Label and date the bottle.
  2. Complete growth media should be stored in the dark at 2°C to 8°C (do not freeze). When stored under these conditions, complete growth media is stable for 30 days.

Handling procedure for frozen cells and initiation of cultures

  1. Refer to the batch specific information provided on the last page of the product information sheet for the total number of viable cells recovered from each lot of ATCC Primary Human Smooth Muscle Cells.
  2. Using the total number of viable cells, determine how much surface area can be inoculated to achieve an initial seeding density between 2,500 and 5,000 cells per cm2.
  3. Prepare the desired combination of flasks. Add 5 mL of complete growth media per 25 cm2 of surface area. Place the flasks in a 37°C, 5% CO2, humidified incubator and allow the media to pre-equilibrate to temperature and pH for 30 minutes prior to adding cells.
  4. While the culture flasks equilibrate, remove 1 vial of ATCC Primary Human Smooth Muscle Cells from storage and thaw the cells by gentle agitation in a 37°C water bath. To reduce the possibility of contamination, keep the O-ring and cap out of the water. Thawing should be rapid (approximately 1 to 2 minutes).
  5. Remove the vial from the water bath as soon as the contents are thawed and decontaminate by dipping in or spraying with 70% ethanol. All operations from this point onward should be carried out under strict aseptic conditions.
  6. Add the appropriate volume of complete growth media [volume = (1 mL x number of flasks to be seeded) - 1 mL] into a sterile conical tube. Using a sterile pipette, transfer the cells from the cryovial to the conical tube. Gently pipette the cells to homogenize the suspension. Do not centrifuge.
  7. Transfer 1.0 mL of the cell suspension to each of the pre-equilibrated culture flasks prepared in steps 1 to 3 of Handling Procedure for Frozen Cells and Initiation of Cultures. Pipette several times, then cap and gently rock each flask to evenly distribute the cells.
  8. Place the seeded culture flasks in the incubator at 37°C with a 5% CO2 atmosphere. Incubate for at least 24 hours before processing the cells further.

Maintenance

  1. Before beginning, prewarm complete growth media in a 37°C water bath. This will take between 10 and 30 minutes, depending on the volume. If using a small volume of medium (50 mL or less), warm only the volume needed in a sterile conical tube. Avoid warming complete growth media multiple times.
  2. 24 to 36 hours after seeding, remove the cells from the incubator and view each flask under the microscope to determine percent cellular confluence.
  3. Carefully remove the spent media without disturbing the monolayer.
  4. Add 5 mL of fresh, prewarmed complete growth media per 25 cm2 of surface area and return the flasks to the incubator.
  5. After 24 to 48 hours, view each flask under the microscope to determine percent cellular confluence. If not ready to passage, repeat steps 3 and 4 as described above. When cultures have reached approximately 80% to 90% confluence, and are actively proliferating (many mitotic figures are visible), it is time to subculture. Vascular smooth muscle cells are contact inhibited; post-confluent vascular smooth muscle cells may not proliferate after passaging.

Note: Cells are typically ready to passage after 7 to 9 days in culture when inoculated with 2,500 cells/cm2.

Subculture

  1. Passage normal vascular smooth muscle cells when the culture has reached approximately 80% confluence.
  2. Warm both the Trypsin-EDTA for Primary Cells (ATCC PCS-999-003) and the Trypsin Neutralizing Solution (ATCC PCS-999-004) to room temperature prior to dissociation. Warm complete growth medium to 37°C prior to use with the cells.
  3. For each flask, carefully aspirate the spent media without disturbing the monolayer.
  4. Rinse the cell layer two times with 3 to 5 mL D-PBS (ATCC 30-2200) to remove residual traces of serum.
  5. Add prewarmed trypsin-EDTA solution (1 to 2 mL for every 25 cm2) to each flask.
  6. Gently rock each flask to ensure complete coverage of the trypsin-EDTA solution over the cells and then aspirate the excess fluid off of the monolayer.
  7. Observe the cells under the microscope. When the cells pull away from each other and round up (typically within 1 to 3 minutes), remove the flask from the microscope and gently tap it from several sides to promote detachment of the cells from the flask surface.
  8. When the majority of cells appear to have detached, quickly add an equal volume of Trypsin Neutralizing Solution (ATCC PCS-999-004) to each flask. Gently pipette or swirl the culture to ensure all of the trypsin-EDTA solution has been neutralized.
  9. Transfer the dissociated cells to a sterile centrifuge tube and set aside while processing any remaining cells in the flask.
  10. Add 3 to 5 mL D-PBS (ATCC 30-2200) to the flask to collect any additional cells that might have been left behind.
  11. Transfer the cell/D-PBS suspension to the centrifuge tube containing the trypsin-EDTA dissociated cells.
  12. Repeat steps 10 and 11 as needed until all cells have been collected from the flask.
  13. Centrifuge the cells at 150 x g for 3 to 5 minutes.
  14. Aspirate the neutralized dissociation solution from the cell pellet and resuspend the cells in 2 to 8 mL fresh, prewarmed, complete growth medium.
  15. Count the cells and seed new flasks at a density of 2,500 to 5,000 cells per cm2.
  16. Place newly seeded flasks in a 37°C, 5% CO2, incubator for at least 24 to 48 hours before processing the cells further. Refer to Maintenance for guidelines on feeding.
Blue craniofacial embryonic smooth muscle cell.

ATCC Primary Human Epithelial Cell Solutions

Introduction

Orange and brown primary prostate epithelial cells.

Primary Prostate Epithelial Cells; Normal, Human (ATCC PCS-440-010)

Epithelia are tissues found throughout the body. They line the cavities of glands and organs in the body and also cover flat surfaces, such as skin. Epithelial cells are polarized cells that discriminate between an apical and basolateral compartment. They perform a variety of functions depending on their location, including boundary and protection, sensory, secretion, transportation, absorption, and diffusion. One challenging aspect of culturing primary epithelial cells is overgrowth of stromal cells. Stromal fibroblasts can be inhibited by culturing explants in low serum or serum-free culture media, limiting the calcium concentration in the growth medium, selectively inhibiting fibroblasts with agents, or by targeting with antimesodermal antibodies.14

ATCC Primary Cell Solutions offers epithelial cells isolated from human bronchi, trachea, and small airways, as well as the cornea, prostate, and kidneys. The usefulness of such cultures has been found in studies related to inflammation, microbial infection, and pathogenesis, including influenza, cancer, toxicology, gene regulation and tissue development, cell-matrix interactions, as well as application in toxicology testing and drug screening/development.

Cell culture protocols

Materials needed

Table 6: Primary cells and complete growth medium

Epithelial cells Growth kit options* Basal medium

Small Airway Epithelial Cells; Normal, Human (ATCC PCS-301-010)

Bronchial/Tracheal Epithelial Cells; Normal, Human (ATCC PCS-300-010)

Lobar Bronchial Epithelial Cells; Normal, Human (PCS-300-015)

Bronchial Epithelial Cell Growth Kit (ATCC PCS-300-040)

Bronchial Epithelial Cell Growth Kit (ATCC PCS-300-040)

Bronchial Epithelial Cell Growth Kit (ATCC PCS-300-040)

Airway Epithelial Cell Basal Medium (ATCC PCS-300-030)

Airway Epithelial Cell Basal Medium (ATCC PCS-300-030)

Airway Epithelial Cell Basal Medium (ATCC PCS-300-030)


Renal Proximal Tubule Epithelial Cells; Normal, Human (ATCC PCS-400--010)

Renal Cortical Epithelial Cells; Normal, Human (ATCC PCS-400-011)

Renal Mixed Epithelial Cells; Normal, Human (ATCC PCS-400-012)

Bladder Epithelial Cells (A/T/N); Normal, Human (PCS-420-010)

Renal Epithelial Cell Growth Kit (ATCC PCS-400-040)

Renal Epithelial Cell Growth Kit (ATCC PCS-400-040)

Renal Epithelial Cell Growth Kit (ATCC PCS-400-040)

Bladder Epithelial Growth Kit (PCS-420-042)

Renal Epithelial Cell Basal Medium (ATCC PCS-400-030)

Renal Epithelial Cell Basal Medium (ATCC PCS-400-030)

Renal Epithelial Cell Basal Medium (ATCC PCS-400-030)

Bladder Epithelial Basal Medium (PCS-420-032)

Prostate Epithelial Cells; Normal, Human (ATCC PCS-440-010)

Vaginal Epithelial Cells; Normal, Human (PCS-480-010)

Cervical Epithelial Cells; Normal, Human (PCS-480-011)

Mammary Epithelial Cells; Normal, Human (PCS-600-010)

Prostate Epithelial Cell Growth Kit (ATCC PCS-440-040)

Vaginal Epithelial Growth Kit (PCS-480-040)

Cervical Epithelial Cell Growth Kit (PCS-480-042)

Mammary Epithelial Cell Growth Kit (PCS-600-040)

Prostate Epithelial Cell Basal Medium (ATCC PCS-440-030)

Vaginal Epithelial Basal Medium (PCS-480-030)

Cervical Epithelial Cell Basal Medium (PCS-480-032)

Mammary Epithelial Cell Basal Medium (PCS-600-030)

Corneal Epithelial Cells; Normal, Human (ATCC PCS-700-010) Corneal Epithelial Cell Growth Kit (ATCC PCS-700-040) Corneal Epithelial Cell Basal Medium (ATCC PCS-700-030)
Reagents for subculture
D-PBS (ATCC 30-2200)
Trypsin-EDTA for Primary Cells (ATCC PCS-999-003)
Trypsin Neutralizing Solution (ATCC PCS-999-004)

* Phenol red and antibiotics may be added, if desired, and are listed in Table 16 (PDF).

Preparation of complete growth media

  1. Obtain 1 Epithelial Cell Growth Kit (corresponding to the epithelial cell type being used) from the freezer; make sure that the caps of all components are tight.
  2. Thaw the components of the growth kit just prior to adding them to the basal medium.
  3. Obtain 1 bottle of Epithelial Cell Basal Medium (corresponding to the epithelial cell being used) from cold storage.
  4. Decontaminate the external surfaces of all growth kit component vials and the basal medium bottle by spraying them with 70% ethanol.
  5. Using aseptic technique and working in a laminar flow hood or biosafety cabinet, transfer the indicated volume of each growth kit component as indicated in the culture’s corresponding product information sheet, to the bottle of basal medium using a separate sterile pipette for each transfer.
  6. Tightly cap the bottle of complete growth medium and swirl the contents gently to assure a homogeneous solution. Do not shake forcefully to avoid foaming. Label and date the bottle.
  7. Complete growth media should be stored in the dark at 2°C to 8°C (do not freeze). When stored under these conditions, complete growth media is stable for 30 days.

Handling procedure for frozen cells and initiation of cultures

  1. Refer to the batch-specific information provided on the last page of the product information sheet for the total number of viable cells recovered from each lot of ATCC Primary Human Epithelial Cells.
  2. Using the total number of viable cells, determine how much surface area can be inoculated to achieve an initial seeding density of 5,000 cells per cm2.
  3. Prepare the desired combination of flasks. Add 5 mL of complete growth medium per 25 cm2 of surface area. Place the flasks in a 37°C, 5% CO2, humidified incubator and allow the media to pre-equilibrate to temperature and pH for 30 minutes prior to adding cells.
  4. While the culture flasks equilibrate, remove 1 vial of ATCC Primary Human Epithelial Cells from storage and thaw the cells by gentle agitation in a 37°C water bath. To reduce the possibility of contamination, keep the O-ring and cap out of the water. Thawing should be rapid (approximately 1 to 2 minutes).
  5. Remove the vial from the water bath as soon as the contents are thawed and decontaminate by dipping in or spraying with 70% ethanol. All operations from this point onward should be carried out under strict aseptic conditions.
  6. Add the appropriate volume of complete growth medium [volume = (1 mL x number of flasks to be seeded) – 1 mL] into a sterile conical tube. Using a sterile pipette, transfer the cells from the cryovial to the conical tube. Gently pipette the cells to homogenize the suspension. Do not centrifuge.
  7. Transfer 1.0 mL of the cell suspension to each of the pre-equilibrated culture flasks prepared in steps 1 to 3 of Handling Procedure for Frozen Cells and Initiation of Cultures. Pipette several times, then cap and gently rock each flask to evenly distribute the cells.
  8. Place the seeded culture flasks in the incubator at 37°C, 5% CO2 atmosphere. Incubate for at least 24 hours before processing the cells further.

Maintenance

  1. Before beginning, prewarm complete growth media in a 37°C water bath. This will take between 10 and 30 minutes, depending on the volume. If using a small volume of medium (50 mL or less), warm only the volume needed in a sterile conical tube. Avoid warming complete growth media multiple times.
  2. 24 hours after seeding, remove the cells from the incubator and view each flask under the microscope to determine percent cellular confluence.
  3. Carefully remove the spent media without disturbing the monolayer.
  4. Add 5 mL of fresh, prewarmed complete growth medium per 25 cm2 of surface area and return the flasks to the incubator.
  5. After 24 to 48 hours, view each flask under the microscope to determine percent cellular confluence. If not ready to passage, repeat steps 3 and 4 as described above. When cultures have reached about 80% confluence and are actively proliferating (many mitotic figures are visible), it is time to subculture.

Subculture

  1. Passage normal human epithelial cells when the culture has reached about 80% confluence.
  2. Warm both the Trypsin-EDTA for Primary Cells (ATCC PCS-999-003) and the Trypsin Neutralizing Solution (ATCC PCS-999-004) to room temperature prior to dissociation. Warm the complete growth medium to 37°C prior to use with the cells.
  3. For each flask, carefully aspirate the spent media without disturbing the monolayer.
  4. Rinse the cell layer one time with 3 to 5 mL D-PBS (ATCC 30-2200) to remove residual medium.
  5. Add prewarmed trypsin-EDTA solution (1 to 2 mL for every 25 cm2) to each flask.
  6. Gently rock each flask to ensure complete coverage of the trypsin-EDTA solution over the cells and then aspirate the excess fluid off of the monolayer.
  7. Observe the cells under the microscope. When the cells pull away from each other and round up (typically within 1 to 3 minutes), remove the flask from the microscope and gently tap it from several sides to promote detachment of the cells from the flask surface.
  8. When the majority of cells appear to have detached, quickly add an equal volume of the Trypsin Neutralizing Solution (ATCC PCS-999-004) to each flask. Gently pipette or swirl the culture to ensure all of the trypsin-EDTA solution has been neutralized.
  9. Transfer the dissociated cells to a sterile centrifuge tube and set aside while processing any remaining cells in the culture flask.
  10. Add 3 to 5 mL D-PBS (ATCC 30-2200) to the tissue culture flask to collect any additional cells that might have been left behind.
  11. Transfer the cell/D-PBS suspension to the centrifuge tube containing the trypsin-EDTA dissociated cells.
  12. Repeat steps 10 and 11 as needed until all cells have been collected from the flask.
  13. Centrifuge the cells at 150 x g for 3 to 5 minutes.
  14. Aspirate neutralized dissociation solution from the cell pellet and resuspend the cells in 2 to 8 mL fresh, prewarmed, complete growth medium.
  15. Count the cells and seed new culture flasks at a density of 5,000 viable cells per cm2.
  16. Place newly seeded flasks in a 37°C, 5% CO2 incubator for at least 24 to 48 hours before processing the cells further. Refer to Maintenance for guidelines on feeding.
Green human colon fibroblasts.

ATCC Primary Human Fibroblast Solutions

Introduction

Primary adult human dermal fibroblasts cultured in serum-free medium.

Primary adult human dermal fibroblasts (ATCC PCS-201-012) cultured in serum-free medium.

Fibroblasts play an important role in maintaining the structural integrity of connective tissue and synthesize extracellular matrix proteins, such as collagens, glycosaminoglycans, and glycoproteins.15,16 Fibroblasts are morphologically heterogeneous, and their appearance is dependent on in vivo location and activity. Injury of tissue displays a proliferative stimulus for fibroblasts and induces them to produce wound healing proteins. Fibroblasts used in primary cell culture are commonly isolated from the dermis layer of human neonatal foreskin or adult skin. They are frequently used in studies related to wound healing, tissue engineering and regeneration applications, and the induction of pluripotent stem (iPS) cells. Fibroblasts, treated with mitomycin C to inhibit proliferation, have been extensively used as feeder layers to enhance the cultivation of human stem cells and keratinocytes in vitro.

ATCC Primary Human Fibroblasts can be cultured in complete growth medium with or without serum. The use of Fibroblast Growth Kit–Serum-free creates a completely defined medium for the serum-free culture of human fibroblasts. The rate of proliferation is equal to or greater than media supplemented using FBS (at concentrations ranging from 2% to 10%) through 10 population doublings.

Cell culture protocols

Materials needed

Table 7: Primary cells and complete growth medium

Fibroblasts Growth kit options* Basal medium
Dermal Fibroblasts; Normal, Human, Neonatal (ATCC PCS-201-010) Fibroblast Growth Kit - Serum-free (ATCC PCS-201-040) or Fibroblast Growth Kit - Low Serum (ATCC PCS-201-041) Fibroblast Basal Medium (ATCC PCS-201-030)
Dermal Fibroblasts; Normal, Human, Adult (ATCC PCS-201-012) Fibroblast Growth Kit - Serum-free (ATCC PCS-201-040) or Fibroblast Growth Kit - Low Serum (ATCC PCS-201-041) Fibroblast Basal Medium (ATCC PCS-201-030)
Lung Fibroblasts; Normal, Human (PCS-201-013) Fibroblast Growth Kit - Serum-free (ATCC PCS-201-040) or Fibroblast Growth Kit - Low Serum (ATCC PCS-201-041) Fibroblast Basal Medium (ATCC PCS-201-030)
Gingival Fibroblasts; Normal, Human (PCS-201-018) Fibroblast Growth Kit - Serum-free (ATCC PCS-201-040) or Fibroblast Growth Kit - Low Serum (ATCC PCS-201-041) Fibroblast Basal Medium (ATCC PCS-201-030)
Bladder Fibroblasts; Normal, Human (PCS-420-013) Fibroblast Growth Kit - Serum-free (ATCC PCS-201-040) or Fibroblast Growth Kit - Low Serum (ATCC PCS-201-041) Fibroblast Basal Medium (ATCC PCS-201-030)
Uterine Fibroblast; Normal, Human (PCS-460-010) Fibroblast Growth Kit - Serum-free (ATCC PCS-201-040) or Fibroblast Growth Kit - Low Serum (ATCC PCS-201-041) Fibroblast Basal Medium (ATCC PCS-201-030)
Reagents for subculture
D-PBS (ATCC 30-2200)
Trypsin-EDTA for Primary Cells (ATCC PCS-999-0003)
Trypsin Neutralizing Solution (ATCC PCS-999-004)

*Phenol red and antibiotics may be added, if desired, and are listed in Table 16 (PDF).

Preparation of complete growth media

  1. Obtain 1 growth kit from the freezer; make sure that the caps of all containers are tight.
  2. Thaw the components of the growth kit just prior to adding them to the basal medium. It is necessary to warm the L-glutamine component in a 37°C water bath, and shake to dissolve any precipitates prior to adding to the basal medium.
  3. Obtain 1 bottle of Fibroblast Basal Medium from cold storage.
  4. Decontaminate the external surfaces of all growth kit component vials and the basal medium bottle by spraying them with 70% ethanol.
  5. Using aseptic technique and working in a laminar flow hood or biosafety cabinet, transfer the volume of each growth kit component, as indicated in the following tables, to the bottle of basal medium using a separate sterile pipette for each transfer.

Table 8: Fibroblast Growth Kit–Serum-free (ATCC PCS-201-040)

Component Volume Final concentration
 L-glutamine 18.75 mL 7.5 mM
Hydrocortisone Hemisuccinate 0.5 mL 1μg/mL
HLL Supplement 1.25 mL

HSA 500 μg/mL
Linoleic Acid 0.6 μg/mL
Lecithin 0.6 μg/mL

rh FGF β 0.5 mL 5 ng/mL
rh EGF / TGF β-1 Supplement 0.5 mL

5 ng/mL
30 pg/mL

rh Insulin 0.5 mL 5 μg/mL
Ascorbic acid 0.5 mL 50 μg/mL


Table 9: Fibroblast Growth Kit–Low Serum (ATCC PCS-201-041)

Component Volume Final concentration
rh FGF β 0.5 mL 5 ng/mL
L-glutamine 18.75 mL 7.5 mM
Ascorbic acid 0.5 mL 50 μg/mL
Hydrocortisone Hemisuccinate 0.5 mL 1 μg/mL
rh Insulin 0.5 mL 5 μg/mL
Fetal Bovine Serum 10.0 mL 2%


  1. Tightly cap the bottle of complete growth medium and swirl the contents gently to assure a homogeneous solution. Do not shake forcefully to avoid foaming. Label and date the bottle.
  2. Complete growth media should be stored in the dark at 2°C to 8°C (do not freeze). When stored under these conditions, complete growth media is stable for 30 days.

Handling procedure for frozen cells and initiation of cultures

  1. Refer to the batch-specific information provided on the last page of the product information sheet for the total number of viable cells recovered from each lot of ATCC Primary Human Fibroblasts.
  2. Using the total number of viable cells reported, determine how much surface area can be inoculated to achieve an initial seeding density of 2,500 to 5,000 cells per cm2 for untreated fibroblasts.
  3. Prepare the desired combination of flasks. Add 5mL of complete growth medium per 25 cm2 of surface area. Place the flasks in a 37°C, 5% CO2, humidified incubator and allow the media to pre-equilibrate to temperature and pH for 30 minutes prior to adding cells.
  4. While the culture flasks equilibrate, remove 1 vial of corresponding ATCC Primary Human Fibroblasts from storage and thaw the cells by gentle agitation in a 37°C water bath. To reduce the possibility of contamination, keep the O-ring and cap out of the water. Thawing should be rapid (approximately 1 to 2 minutes).
  5. Remove the vial from the water bath as soon as the contents are thawed and decontaminate by dipping in or spraying with 70% ethanol. All operations from this point onward should be carried out under strict aseptic conditions.
  6. Add the appropriate volume of complete growth media [volume = (1 mL x number of flasks to be seeded) – 1 mL] into a sterile conical tube. Using a sterile pipette, transfer the cells from the cryovial to the conical tube. Gently pipette the cells to homogenize the suspension. Do not centrifuge.
  7. Transfer 1 mL of the cell suspension to each of the pre-equilibrated culture flasks prepared in steps 1 to 3 of Handling Procedure for Frozen Cells and Initiation of Cultures. Pipette several times, then cap and gently rock each flask to evenly distribute the cells.
  8. Place the seeded culture flasks in the incubator at 37°C, 5% CO2 atmosphere. Incubate at least 24 hours before processing the cells further.

Maintenance

  1. Before beginning, prewarm complete growth media in a 37°C water bath. This will take between 10 and 30 minutes, depending on the volume. If using a small volume of medium (50 mL or less), warm only the volume needed in a sterile conical tube. Avoid warming complete growth media multiple times.
  2. 24 hours after seeding, remove the cells from the incubator and view each flask under the microscope to determine percent cellular confluence.
  3. Carefully remove the spent media without disturbing the monolayer.
  4. Add 5 mL of fresh, prewarmed complete growth media per 25 cm2 of surface area and return the flasks to the incubator.
  5. After 24 to 48 hours, view each flask under the microscope to determine percent cellular confluence. If not ready to passage, repeat steps 3 and 4 as described above. When cultures have reached 80% to 100% confluence, and are actively proliferating (many mitotic figures are visible), it is time to subculture. Fibroblasts are not a contact inhibited cell type.

Subculture

  1. Passage normal human fibroblasts when the cells have reached approximately 80% to 100% confluence and are actively proliferating.
  2. Note: Mitomycin C-treated fibroblasts are mitotically arrested and cannot be subcultured.

  3. Warm both the Trypsin-EDTA for Primary Cells (ATCC PCS-999-003) and the Trypsin Neutralizing Solution (ATCC PCS-999-004) to room temperature prior to dissociation. Warm the complete growth medium to 37°C prior to use with the cells.
  4. For each flask, carefully aspirate the spent media without disturbing the monolayer.
  5. Rinse the cell layer two times with 3 to 5 mL of D-PBS per 25 cm2 of surface area (ATCC 30-2200) to remove any residual traces of serum. Rinse the cell layer one time with 3 to 5 mL of D-PBS if serum-free culture conditions are used.
  6. Add prewarmed trypsin-EDTA solution (1 to 2 mL for every 25 cm2) to each flask.
  7. Gently rock each flask to ensure complete coverage of the trypsin-EDTA solution over the cells, and then aspirate the excess fluid off of the monolayer.
  8. Observe the cells under the microscope. When the cells pull away from each other and round up (typically within about 3 to 5 minutes), remove the flask from the microscope and gently tap it from several sides to promote detachment of the cells from the flask surface.
  9. When the majority of cells appear to have detached, quickly add to each flask, a volume of the Trypsin Neutralizing Solution (ATCC PCS-999-004) equal to the volume of trypsin-EDTA solution used previously. Gently pipette or swirl the culture to ensure all of the trypsin-EDTA solution has been neutralized.
  10. Transfer the dissociated cells to a sterile centrifuge tube and set aside while processing any remaining cells in the culture flask.
  11. Add 3 to 5 mL D-PBS (ATCC 30-2200) to the tissue culture flask to collect any additional cells that might have been left behind.
  12. Transfer the cell/D-PBS suspension to the centrifuge tube containing the trypsin-EDTA dissociated cells.
  13. Repeat steps 10 and 11 as needed until all cells have been collected from the flask.
  14. Centrifuge the cells at 150 x g for 3 to 5 minutes.
  15. Aspirate the neutralized dissociation solution from the cell pellet and resuspend the cells in 2 to 8 mL fresh, prewarmed, complete growth medium.
  16. Count the cells and seed new culture flasks at a density of 2,500 to 5,000 cells per cm2.
  17. Place newly seeded flasks in a 37°C, 5% CO2 incubator for at least 24 to 48 hours before processing the cells further. Refer to Maintenance for guidelines on feeding.
Red and blue gingival keratinocytes.

ATCC Primary Human Keratinocyte Solutions

Introduction

Orange and brown primary epidermal keratinocyte ells.

Primary Epidermal Keratinocytes; Normal, Human, Adult (ATCC PCS-200-011)

Keratinocytes are the most common type of skin cells making up the majority of the epidermis. Dividing keratinocytes produce keratin (a protein that provides strength to skin, hair, and nails) and migrate to the surface of the skin, the stratum corneum, where they serve as the most abundant cells in the skin’s outermost layer.17 Once present in the stratum corneum, keratinocytes differentiate, stop dividing as cornified cells18 and eventually undergo apoptosis. Keratinocytes can be isolated from different locations of the body. However, the most utilized keratinocytes in primary cell culture have been isolated from the epidermis of human juvenile foreskin or human adult skin, the latter of which is significant in the study of adult diseases such as psoriasis and skin cancer.14 Keratinocytes cultured in serum-free, low calcium growth medium will maintain the cells in an un-differentiated, proliferative state while inhibiting fibroblast outgrowth. Keratinocytes are useful for a number of scientific applications including the study of growth factor behavior, wound healing, toxicity/irritancy studies, and use as target cells for derivation of induced pluripotent stem cells.

Cell culture protocols

Materials needed

Table 10: Primary cells and complete growth medium

Keratinocytes Growth kit options* Basal medium
Epidermal Keratinocyte; Normal, Human, Neonatal Foreskin (ATCC PCS-200-010) Keratinocyte Growth Kit (ATCC PCS-200-040) Dermal Cell Basal Medium (ATCC PCS-200-030)
Epidermal Keratinocyte; Normal, Human, Adult (ATCC PCS-200-011) Keratinocyte Growth Kit (ATCC PCS-200-040) Dermal Cell Basal Medium (ATCC PCS-200-030)
Gingival Keratinocytes; Normal, Human (PCS-200-014) Keratinocyte Growth Kit (ATCC PCS-200-040) Dermal Cell Basal Medium (ATCC PCS-200-030)
Reagents for subculture
D-PBS (ATCC 30-2200)
Trypsin-EDTA for Primary Cells (ATCC PCS-999-003)
Trypsin Neutralizing Solution (ATCC PCS-999-004)

*Phenol red and antibiotics may be added if desired and are listed in Table 16 (PDF).

Preparation of complete growth media

  1. Obtain 1 Keratinocyte Growth Kit from the freezer; make sure that the caps of all components are tight.
  2. Thaw the components of the growth kit just prior to adding them to the basal medium. It is necessary to warm the L-glutamine component in a 37°C water bath and shake to dissolve any precipitates prior to adding to the basal medium.
  3. Obtain 1 bottle of Dermal Cell Basal Medium from cold storage.
  4. Decontaminate the external surfaces of all growth kit component vials and the basal medium bottle by spraying them with 70% ethanol.
  5. Using aseptic technique and working in a laminar flow hood or biosafety cabinet, transfer the indicated volume of each growth kit component, as indicated in the following table, to the bottle of basal medium using a separate sterile pipette for each transfer.

Table 11: Keratinocyte Growth Kit (ATCC PCS-200-040)

Component Volume Final concentration
Bovine Pituitary Extract (BPE) 2.0 mL 0.4%
rh TGF-α 0.5 mL 0.5 ng/mL
L-Glutamine 15.0 mL 6 mM
Hydrocortisone Hemisuccinate 0.5 mL 100 ng/mL
rh Insulin 0.5 mL 5 μg/mL
Epinephrine 0.5 mL 1.0 μM
Apo-Transferrin 0.5 mL 5 μg/ml
  1. Tightly cap the bottle of complete growth medium and swirl the contents gently to assure a homogeneous solution. Do not shake forcefully to avoid foaming. Label and date the bottle.
  2. Complete growth media should be stored in the dark at 2°C to 8°C (do not freeze). When stored under these conditions, complete growth media is stable for 30 days.

Handling procedure for frozen cells and initiation of cultures

  1. Refer to the batch specific information provided on the last page of the product information sheet for the total number of viable cells recovered from each lot of ATCC Primary Human Keratinocytes.
  2. Using the total number of viable cells, determine how much surface area can be inoculated to achieve an initial seeding density between 2,500 and 5,000 cells per cm2.
  3. Prepare the desired combination of flasks. Add 5 mL of complete growth medium per 25 cm2 of surface area. Place the flasks in a 37°C, 5% CO2, humidified incubator and allow the media to pre-equilibrate to temperature and pH for 30 minutes prior to adding cells.
  4. While the culture flasks equilibrate, remove 1 vial of ATCC Primary Human Keratinocytes from storage and thaw the cells by gentle agitation in a 37°C water bath. To reduce the possibility of contamination, keep the O-ring and cap out of the water. Thawing should be rapid (approximately 1 to 2 minutes).
  5. Remove the vial from the water bath as soon as the contents are thawed, and decontaminate by dipping in or spraying with 70% ethanol. All operations from this point onward should be carried out under strict aseptic conditions.
  6. Add the appropriate volume of complete growth medium [volume = (1 mL x number of flasks to be seeded) – 1 mL] into a sterile conical tube. Using a sterile pipette, transfer the cells from the cryovial to the conical tube. Gently pipette the cells to homogenize the suspension. Do not centrifuge.
  7. Transfer 1.0 ml of the cell suspension to each of the pre-equilibrated culture flasks prepared in steps 1 to 3 of Handling Procedure for Frozen Cells and Initiation of Cultures. Pipette several times, then cap and gently rock each flask to evenly distribute the cells.
  8. Place the seeded culture flasks in the incubator at 37°C, 5% CO2 atmosphere. Incubate for at least 24 hours before processing the cells further.

Maintenance

  1. Before beginning, prewarm complete growth media in a 37°C water bath. This will take between 10 and 30 minutes, depending on the volume. If using a small volume of medium (50 mL or less), warm only the volume needed in a sterile conical tube. Avoid warming complete growth media multiple times.
  2. 24 hours after seeding, remove the cells from the incubator and view each flask under the microscope to determine percent cellular confluence.
  3. Carefully remove the spent media without disturbing the monolayer.
  4. Add 5 mL of fresh, pre-warmed complete growth medium per 25 cm2 of surface area and return the flasks to the incubator.
  5. After 24 to 48 hours, view each flask under the microscope to determine percent cellular confluence. If not ready to passage, repeat steps 3 and 4 as described above. When cultures have reached approximately 80% confluence, and are actively proliferating (many mitotic figures are visible), it is time to subculture. Keratinocytes will begin to terminally differentiate once they become 100% confluent.

Subculture

  1. Passage normal keratinocytes when the culture has reached approximately 70% to 80% confluence.
  2. Warm both the Trypsin-EDTA for Primary Cells (ATCC PCS-999-003) and the Trypsin Neutralizing Solution (ATCC PCS-999-004) to room temperature prior to dissociation. Warm the complete growth medium to 37°C prior to use with the cells.
  3. For each flask, carefully aspirate the spent media without disturbing the monolayer.
  4. Rinse the cell layer one time with 3 to 5 mL D-PBS (ATCC 30-2200) to remove residual medium.
  5. Add pre-warmed trypsin-EDTA solution (1 to 2 mL for every 25 cm2) to each flask.
  6. Gently rock each flask to ensure complete coverage of the trypsin-EDTA solution over the cells and then aspirate the excess fluid off of the monolayer.
  7. Note: If cells are difficult to detach, incubate each flask containing cells and the trypsin-EDTA solution at 37°C to facilitate dispersal.

  8. Observe the cells under the microscope. When the cells pull away from each other and round up (typically within 3 to 6 minutes), remove the flask from the microscope and gently tap it from several sides to promote detachment of the cells from the flask surface.
  9. When the majority of cells appear to have detached, quickly add an equal volume of the Trypsin Neutralizing Solution (ATCC PCS-999-004) to each flask. Gently pipette or swirl the culture to ensure all of the trypsin-EDTA solution has been neutralized.
  10. Transfer the dissociated cells to a sterile centrifuge tube and set aside while processing any remaining cells in the culture flask.
  11. Add 3 to 5 mL D-PBS (ATCC 30-2200) to the tissue culture flask to collect any additional cells that might have been left behind.
  12. Transfer the cell/D-PBS suspension to the centrifuge tube containing the trypsin-EDTA dissociated cells.
  13. Repeat steps 10 and 11 as needed until all cells have been collected from the flask.
  14. Centrifuge the cells at 150 x g for 3 to 5 minutes.
  15. Aspirate neutralized dissociation solution from the cell pellet and resuspend the cells in 2 to 8 mL fresh, pre-warmed, complete growth medium.
  16. Count the cells and seed new culture flasks at a density of 2,500 to 5,000 cells per cm2.
  17. Place newly seeded flasks in a 37°C, 5% CO2 incubator for at least 24 to 48 hours before processing the cells further. Refer to Maintenance for guidelines on feeding.
Stacked petri dishes containing pink and orange media.

ATCC Primary Human Melanocyte Solutions

Introduction

Orange, yellow, and brown adult human melanocyte cells.

Adult human melanocytes (ATCC PCS-200-013)

Melanocytes are found mainly in the epidermis, but may occur elsewhere in the body such as in the matrix of the hair. They are specialized skin cells that produce the pigment melanin, which gives skin its color and protects it from the hazardous effects of UV radiation. The most useful melanocytes for research are isolated from the epidermis of human juvenile foreskin or human adult skin. Special care must be taken to prevent contamination of melanocyte cultures with keratinocytes or fibroblasts found in the epidermis. Lowering the concentration of calcium in the medium to 60 μM and selecting for adherent melanocytes in hormone-supplemented medium aids in the isolation of melanocytes from epidermal tissue.14 Melanocytes are frequently used in the in vitro study of wound healing, and as testing models for toxicity/irritancy studies, melanoma, dermal response to UV radiation, psoriasis and other skin diseases, and cosmetic research (eg, skin lightening compounds, skin protecting compounds).

Cell culture protocols

Materials needed

Table 12: Primary cells and complete growth medium

Melanocytes Growth kit options Basal medium

Epidermal Melanocytes; Normal Human, Neonatal (ATCC PCS-200-012)

Epidermal Melanocytes; Normal, Human, Adult (ATCC PCS-200-013)

Melanocyte Growth Kit (ATCC PCS-200-041)

Adult Melanocyte Growth Kit (ATCC PCS-200-042)

Dermal Cell Basal Medium (ATCC PCS-200-030)
Reagents for subculture
D-PBS (ATCC 30-2200)
Trypsin-EDTA for Primary Cells (ATCC PCS-999-003)
Trypsin Neutralizing Solution (ATCC PCS-999-004)

*Phenol red and antibiotics may be added, if desired, and are listed in Table 16 (PDF).

Preparation of complete growth media

  1. Obtain 1 Melanocyte Growth Kit (corresponding to the melanocyte being used) from the freezer; make sure that the caps of all components are tight.
  2. Thaw the components of the growth kit just prior to adding them to the basal medium. It is necessary to warm the L-glutamine component in a 37°C water bath and shake to dissolve any precipitates prior to adding to the basal medium.
  3. Obtain 1 bottle of Dermal Cell Basal Medium from cold storage.
  4. Decontaminate the external surfaces of all growth kit component vials and the basal medium bottle by spraying them with 70% ethanol.
  5. Using aseptic technique and working in a laminar flow hood or biosafety cabinet, transfer the indicated volume of each growth kit component, as indicated in the following table, to the bottle of basal medium using a separate sterile pipette for each transfer.

Table 13: Melanocyte Growth Kit (ATCC PCS-200-041)

Component Volume Final concentration
rh Insulin 0.5 mL 5 μg/ml
Ascorbic Acid 0.5 mL 50 μg/ml
L-Glutamine 15.0 mL 6 mM
Epinephrine 0.5 mL 1.0 μM
Calcium Chloride 80 μl 0.2 mM
M8 Supplement 5ml Proprietary formulation
  1. Tightly cap the bottle of complete growth medium and swirl the contents gently to assure a homogeneous solution. Do not shake forcefully to avoid foaming. Label and date the bottle.
  2. Complete growth media should be stored in the dark at 2°C to 8°C (do not freeze). When stored under these conditions, complete growth media is stable for 30 days.

Handling procedure for frozen cells and initiation of cultures

  1. Refer to the batch specific information provided on the last page of the product information sheet for the total number of viable cells recovered from each lot of ATCC Primary Human Melanocytes.
  2. Using the total number of viable cells, determine how much surface area can be inoculated to achieve an initial seeding density of 5,000 cells per cm2.
  3. Prepare the desired combination of flasks. Add 5 mL of complete growth medium per 25 cm2 of surface area. Place the flasks in a 37°C, 5% CO2, humidified incubator and allow the media to pre-equilibrate to temperature and pH for 30 minutes prior to adding cells.
  4. While the culture flasks equilibrate, remove 1 vial of ATCC Primary Human Melanocytes from storage and thaw the cells by gentle agitation in a 37°C water bath. To reduce the possibility of contamination, keep the O-ring and cap out of the water. Thawing should be rapid (approximately 1 to 2 minutes).
  5. Remove the vial from the water bath as soon as the contents are thawed, and decontaminate by dipping in or spraying with 70% ethanol. All operations from this point onward should be carried out under strict aseptic conditions.
  6. Add the appropriate volume of complete growth medium [volume = (1 mL x number of flasks to be seeded) – 1 mL] into a sterile conical tube. Using a sterile pipette, transfer the cells from the cryovial to the conical tube. Gently pipette the cells to homogenize the suspension. Do not centrifuge.
  7. Transfer 1.0 ml of the cell suspension to each of the pre-equilibrated culture flasks prepared in steps 1 to 3 of Handling Procedure for Frozen Cells and Initiation of Cultures. Pipette several times, then cap and gently rock each flask to evenly distribute the cells.
  8. Place the seeded culture flasks in the incubator at 37°C, 5% CO2 atmosphere. Incubate for at least 24 hours before processing the cells further.

Maintenance

  1. Before beginning, pre-warm complete growth media in a 37°C water bath. This will take between 10 and 30 minutes, depending on the volume. If using a small volume of medium (50 mL or less), warm only the volume needed in a sterile conical tube. Avoid warming complete growth media multiple times.
  2. 24 to 36 hours after seeding, remove the cells from the incubator and view each flask under the microscope to determine percent cellular confluence.
  3. Carefully remove the spent media without disturbing the monolayer.
  4. Add 5 mL of fresh, prewarmed complete growth medium per 25 cm2 of surface area and return the flasks to the incubator.
  5. After 24 to 48 hours, view each flask under the microscope to determine percent cellular confluence. If not ready to passage, repeat steps 3 and 4 as described above. When cultures have reached 80% to 90% confluence, and are actively proliferating (many mitotic figures are visible), it is time to subculture. Melanocytes are not contact inhibited; however, they will proliferate best if the cells are passaged prior to 100% confluence. Melanocytes from lightly pigmented tissue should reach 80% confluence in 7 to 9 days.

Subculture

  1. Passage normal melanocytes when the culture has reached approximately 80% to 90% confluence.
  2. Warm both the Trypsin-EDTA for Primary Cells (ATCC PCS-999-003) and the Trypsin Neutralizing Solution (ATCC PCS-999-004) to room temperature prior to dissociation. Warm the complete growth medium to 37°C prior to use with the cells.
  3. For each flask, carefully aspirate the spent media without disturbing the monolayer.
  4. Rinse the cell layer two times with 3 to 5 mL D-PBS (ATCC 30-2200) to remove residual medium.
  5. Add pre-warmed trypsin-EDTA solution (1 to 2 mL for every 25 cm2) to each flask.
  6. Gently rock each flask to ensure complete coverage of the trypsin-EDTA solution over the cells, and then aspirate the excess fluid off of the monolayer.
  7. Observe the cells under the microscope. When the cells pull away from each other and round up (typically within 1 to 3 minutes), remove the flask from the microscope and gently tap it from several sides to promote detachment of the cells from the flask surface.
  8. Note: Melanocytes are sensitive to over-trypsinization.

  9. When the majority of cells appear to have detached, quickly add an equal volume of the Trypsin Neutralizing Solution (ATCC PCS-999-004) to each flask. Gently pipette or swirl the culture to ensure all of the trypsin-EDTA solution has been neutralized.
  10. Transfer the dissociated cells to a sterile centrifuge tube and set aside while processing any remaining cells in the culture flask.
  11. Add 3 to 5 mL D-PBS (ATCC 30-2200) to the tissue culture flask to collect any additional cells that might have been left behind.
  12. Transfer the cell/D-PBS suspension to the centrifuge tube containing the trypsin-EDTA dissociated cells.
  13. Repeat steps 10 and 11 as needed until all cells have been collected from the flask.
  14. Centrifuge the cells at 150 × g for 3 to 5 minutes.
  15. Aspirate neutralized dissociation solution from the cell pellet and resuspend the cells in 2 to 8 mL fresh, pre-warmed, complete growth medium.
  16. Count the cells and seed new culture flasks at a density of 2,500 to 5,000 cells per cm2.
  17. Place newly seeded flasks in a 37°C, 5% CO2 incubator for at least 24 to 48 hours before processing the cells further. Refer to Maintenance for guidelines on feeding.
Green mesenchymal IPS stem cells.

ATCC Human Mesenchymal Stem Cell and Differentiation Solutions

Introduction

Adipose-Derived Mesenchymal Stem Cells: Normal, Human (ATCC PCS-500-011)

Adipose-Derived Mesenchymal Stem Cells; Normal, Human (ATCC PCS-500-011)

ATCC Human Mesenchymal Stem Cells (MSCs) are self-renewing multipotent adult stem cells. MSCs are traditionally found in the bone marrow, but can also be isolated from other tissues, including adipose, human umbilical cord or cord blood, and peripheral blood. Adipose-derived mesenchymal stem cells are isolated from human adipose (fat) tissues by lipoaspiration or biopsy. Umbilical cord derived mesenchymal stem cells are isolated from Wharton’s Jelly found in human umbilical cord. Although MSCs from primary adipose tissue and Wharton’s Jelly are considered to be relatively easy to obtain, isolation of consistent stem cell populations from such material is costly and time-consuming. Lipoaspirates and umbilical cord tissue represent a heterogeneous mixture of cell types, including adipocytes, endothelial cells, smooth muscle, pericytes and progenitor cells.2 The inherent heterogeneity of this source material, then, yields a high potential for cellular contamination to predominate cultures.

To ensure the purity of ATCC Primary Cell Solutions Normal Human Mesenchymal Stem Cells, each batch is isolated from single-donor tissue, cryopreserved in the second passage, and tested for:

  1. Authentication of growth and morphology, including adherence to plastic when cultured in optimized growth medium consisting of Mesenchymal Stem Cell Basal Medium (ATCC PCS-500-030) supplemented with Mesenchymal Stem Cell Growth Kit-Low Serum (ATCC PCS-500-040)
  2. Verification of surface antigen expression,13 including a total of 10 markers: Positive (≥ 95%) for CD29, CD44, CD73, CD90, CD105, and CD166; and, negative (≥ 2%) for CD14, CD31, CD34, and CD45
  3. Confirmation of multi-lineage differentiation into osteoblasts, adipocytes, and chondrocytes using optimized differentiation kits and protocols

MSCs are useful tools for noncontroversial stem cell differentiation research and for the creation of induced pluripotent stem (iPS) cell lines.8 MSCs have also found applications in tissue engineering,3,14,5,11 cell therapy,12 and regenerative medicine.6,7,9,10

Blue and green bar chart for ATCC Primary Cell Solutions surface antigen positivity

ATCC Primary Cell Solutions adipose-derived mesenchymal stem cells were taken from liquid nitrogen and cultures initiated. A sample for analysis by flow cytometry was taken when the culture was initiated and then after 48-hours of growth. The cells must test positive for CD29, CD44, CD73, CD90, CD105, and CD166 (greater than 95% of the cell population expresses these markers by flow cytometry). The cells must test negative for CD14, CD31, CD34, and CD45 (less than 2% of cell population expresses these markers by flow cytometry).

Cell culture protocols

Materials needed

Table 14: Primary cells and complete growth medium

Mesenchymal stem cells Growth kit options Basal medium
Adipose-Derived Mesenchymal Stem Cells; Normal, Human (ATCC PCS-500-011) Mesenchymal Stem Cell Growth Kit-Low Serum (ATCC PCS-500-040) Mesenchymal Stem Cell Basal Medium (ATCC PCS-500-030)
Umbilical Cord-Derived Mesenchymal Stem Cells; Normal, Human (ATCC PCS-500-010) Mesenchymal Stem Cell Growth Kit-Low Serum (ATCC PCS-500-040) Mesenchymal Stem Cell Basal Medium (ATCC PCS-500-030)
Bone-Marrow-Derived Mesenchymal Stem Cells; Normal, Human (ATCC PCS-500-012) Mesenchymal Stem Cell Growth Kit-Low Serum (ATCC PCS-500-040) Mesenchymal Stem Cell Basal Medium (ATCC PCS-500-030)
Subcutaneous Pre-adipocytes; Normal, Human (ATCC PCS-210-010) Fibroblast Growth Kit-Low Serum (ATCC PCS-201-041) Fibroblast Basal Medium (ATCC PCS-201-030)
Reagents for subculture
D-PBS (ATCC 30-2200)
Trypsin-EDTA for Primary Cells (ATCC PCS-999-003)
Trypsin Neutralizing Solution (ATCC PCS-999-004)

Preparation of complete growth media

  1. Obtain 1 Mesenchymal Stem Cell Growth Kit–Low Serum from the freezer; make sure that the caps of all components are tight.
  2. Thaw the components of the growth kit just prior to adding them to the basal medium.
  3. Obtain 1 bottle of Mesenchymal Stem Cell Basal Medium from cold storage.
  4. Decontaminate the external surfaces of all growth kit component vials and the basal medium bottle by spraying them with 70% ethanol.
  5. Using aseptic technique and working in a laminar flow hood or biosafety cabinet, transfer the indicated volume of each growth kit component, as indicated in the following table, to the bottle of basal medium using a separate sterile pipette for each transfer.

Table 15: Mesenchymal Stem Cell Growth Kit–Low Serum (ATCC PCS-500-040)

Component Volume Final concentration
MSC Supplement 10 mL

2% FBS
5 ng/mL rh FGF basic
5 ng/mL rh FGF acidic
5 ng/mL rh EGF

L-Alanyl-L-Glutamine 6 mL 2.4 mM
  1. Tightly cap the bottle of complete growth medium and swirl the contents gently to assure a homogeneous solution. Do not shake forcefully to avoid foaming. Label and date the bottle.
  2. Complete growth media should be stored in the dark at 2°C to 8°C (do not freeze). When stored under these conditions, complete growth media is stable for two weeks.

Handling procedure for frozen cells and initiation of cultures

  1. Refer to the batch specific information provided on the last page of the product information sheet for the total number of viable cells recovered from each lot of ATCC Human Mesenchymal Stem Cells.
  2. Using the total number of viable cells, determine how much surface area can be inoculated to achieve an initial seeding density of 5,000 cells per cm2.
  3. Prepare the desired combination of flasks. Add 5 mL of complete growth medium per 25 cm2 of surface area. Place the flasks in a 37°C, 5% CO2, humidified incubator and allow the media to pre-equilibrate to temperature and pH for 30 minutes prior to adding cells.
  4. While the culture flasks equilibrate, remove 1 vial of ATCC Human Mesenchymal Stem Cells from storage and thaw the cells by gentle agitation in a 37°C water bath. To reduce the possibility of contamination, keep the O-ring and cap out of the water. Thawing should be rapid (approximately 1 to 2 minutes).
  5. Remove the vial from the water bath as soon as the contents are thawed and decontaminate by dipping in or spraying with 70% ethanol. All operations from this point onward should be carried out under strict aseptic conditions.
  6. Add the appropriate volume of complete growth medium [volume = (1 mL x number of flasks to be seeded) – 1 mL] into a sterile conical tube. Using a sterile pipette, transfer the cells from the cryovial to the conical tube. Gently pipette the cells to homogenize the suspension. Do not centrifuge.
  7. Transfer 1.0 ml of the cell suspension to each of the pre-equilibrated culture flasks prepared in steps 1 to 3 of Handling Procedure for Frozen Cells and Initiation of Cultures. Pipette several times, then cap and gently rock each flask to evenly distribute the cells.
  8. Place the seeded culture flasks in the incubator at 37°C, 5% CO2 atmosphere. Incubate for at least 24 hours before processing the cells further.

Maintenance

  1. Before beginning, prewarm complete growth media in a 37°C water bath. This will take between 10 and 30 minutes, depending on the volume. If using a small volume of medium (50 mL or less), warm only the volume needed in a sterile conical tube. Avoid warming complete growth media multiple times.
  2. 24 hours after seeding, remove the cells from the incubator and view each flask under the microscope to determine percent cellular confluence.
  3. Note: Adipose- and umbilical cord-derived stem cells are contact inhibited. It is essential that the cells be subcultured BEFORE reaching confluence as post-confluent cells exhibit changes in morphology, slower proliferation, and reduced differentiation capacity after passaging.

  4. Carefully remove the spent media without disturbing the monolayer.
  5. Add 5 mL of fresh, prewarmed complete growth medium per 25 cm2 of surface area and return the flasks to the incubator.
  6. After 24 to 48 hours, view each flask under the microscope to determine percent cellular confluence. If not ready to passage, repeat steps 3 and 4 as described above. When cultures have reached approximately 70% to 80% confluence, and are actively proliferating (many mitotic figures are visible), it is time to subculture.

Subculture

  1. Passage normal mesenchymal stem cells when the culture has reached approximately 70% to 80% confluence.
  2. Warm both the Trypsin-EDTA for Primary Cells (ATCC PCS-999-003) and the Trypsin Neutralizing Solution (ATCC PCS-999-004) to room temperature prior to dissociation. Warm the complete growth medium to 37°C prior to use with the cells.
  3. For each flask, carefully aspirate the spent media without disturbing the monolayer.
  4. Rinse the cell layer one time with 3 to 5 mL D-PBS (ATCC 30-2200) to remove residual medium.
  5. Add pre-warmed trypsin-EDTA solution (1 to 2 mL for every 25 cm2) to each flask.
  6. Gently rock each flask to ensure complete coverage of the trypsin-EDTA solution over the cells and then aspirate the excess fluid off of the monolayer.
  7. Observe the cells under the microscope. When the cells pull away from each other and round up (typically within 1 to 3 minutes), remove the flask from the microscope and gently tap it from several sides to promote detachment of the cells from the flask surface.
  8. When the majority of cells appear to have detached, quickly add an equal volume of the Trypsin Neutralizing Solution (ATCC PCS-999-004) to each flask. Gently pipette or swirl the culture to ensure all of the trypsin-EDTA solution has been neutralized.
  9. Transfer the dissociated cells to a sterile centrifuge tube and set aside while processing any remaining cells in the culture flask.
  10. Add 3 to 5 mL D-PBS (ATCC 30-2200) to the tissue culture flask to collect any additional cells that might have been left behind.
  11. Transfer the cell/D-PBS suspension to the centrifuge tube containing the trypsin-EDTA dissociated cells.
  12. Repeat steps 10 and 11 as needed until all cells have been collected from the flask.
  13. Centrifuge the cells at 150 x g for 3 to 5 minutes.
  14. Aspirate neutralized dissociation solution from the cell pellet and resuspend the cells in 2 to 8 mL fresh, pre-warmed, complete growth medium.
  15. Count the cells and seed new culture flasks at a density of 5,000 viable cells per cm2.
  16. Place newly seeded flasks in a 37°C, 5% CO2 incubator for at least 24 to 48 hours before processing the cells further. Refer to Maintenance for guidelines on feeding.

Adipose-derived mesenchymal stem cell differentiation protocols

Adipocyte differentiation

Materials needed

The Adipocyte Differentiation Toolkit (ATCC PCS-500-050) contains medium and reagents designed to induce adipogenesis in actively proliferating Adipose-Derived Mesenchymal Stem Cells (ATCC PCS-500-011) with high efficiency, and support maturation of derived adipocytes during lipid accumulation.

Preparing cells for adipocyte differentiation

  1. Follow the instructions for the growth of Adipose-Derived Mesenchymal Stem Cells (ATCC PCS-500-011). It is recommended that the cells not be passaged more than four (4) times before initiating adipocyte differentiation.
  2. When cells are 70-80% confluent, passage them into a tissue culture plate at a density of 18,000 cells/cm2. Adjust the number of cells and volume of media according to the tissue culture plate used. Example: For a 6-well tissue culture plate with a surface area of 9.5 cm2/well, add a total of 171,000 viable cells to each well containing 2 mL of Mesenchymal Stem Cell Basal Medium (ATCC PCS-500-030) supplemented with Mesenchymal Stem Cell Growth Kit–Low Serum (ATCC PCS-500-040) components.
  3. Gently rock the plate back and forth and side to side to evenly distribute cells before incubation. Do not swirl.
  4. Incubate the cells at 37°C with 5% CO2 for 48 hours before initiating adipocyte differentiation.

Adipocyte differentiation media preparation

The adipocyte differentiation process requires two separate media preparations: one for initiation and one for maintenance. Stock solutions of these media can be prepared in tandem in advance as follows:

  1. Thaw all 3 components of the differentiation kit and warm to 37°C in a water bath.
  2. Note: It may be necessary to shake the AD Supplement and the ADM Supplement upon warming to help re-dissolve any components that may have precipitated out of solution upon freezing.

  3. Decontaminate the external surfaces of all 3 kit components by spraying them with 70% ethanol.
  4. Using aseptic technique and working in a laminar flow hood or biosafety cabinet:
    1. Transfer 15 mL of Adipocyte Basal Medium and 1 mL of AD Supplement to a sterile 50 mL conical tube, using a separate sterile pipette for each transfer. This is your working stock of Adipocyte Differentiation Initiation Medium used during the first 96 hours of differentiation.
    2. Add 5 mL of ADM Supplement to the remaining 85 mL of Adipocyte Basal Medium. This is your working stock of Adipocyte Differentiation Maintenance Medium.
  5. Tightly cap the each container of media and swirl the contents gently to assure a homogeneous solution. Do not shake forcefully to avoid foaming. Label and date the bottle.
  6. Each container of differentiation medium should be stored in the dark at 2°C to 8°C (do not freeze). When stored under these conditions, the differentiation media is stable for up to 3 weeks.

Adipocyte differentiation procedure

Adipocytes differentiated from Adipose-Derived Mesenchymal Stem Cells (PCS- 500-011) and stained with Oil Red O to detect the formation of lipid droplets.

Adipocytes differentiated from Adipose-Derived Mesenchymal Stem Cells (PCS-500-011) and stained with Oil Red O to detect the formation of lipid droplets.

A. Initiation phase

  1. After incubating the prepared Adipose-Derived Mesenchymal Stem Cells for (as described above), carefully aspirate the media from the wells.
  2. Immediately rinse the cells once by adding 2 mL of room-temperature D-PBS (ATCC 30-2200) to each well, then carefully aspirate the PBS from the wells.
  3. Add 2 mL of pre-warmed (37°C) Adipocyte Differentiation Initiation Medium to each well to begin the adipocyte differentiation process.
  4. Incubate the cells at 37°C with 5% CO2 for 48 hours.
  5. Note: It is recommended that you transfer the required volume of media to a sterile tube for pre-warming prior to each feeding rather than repeatedly re-warming the entire working stock.

  6. Feed the cells by carefully removing half the volume of media (1 mL) from each well and adding another 2 mL of pre-warmed (37°C) Adipocyte Differentiation Initiation Medium to each well.
    Important: DO NOT TILT plate during aspiration. It is important that the cell monolayer is not exposed to air during this and subsequent steps to ensure that developing lipid vesicles do not burst.

B. Maintenance phase

Blue sphere of ATCC Adipose-derived Mesenchymal Stem Cells.

ATCC Adipose-Derived Mesenchymal Stem Cells were expanded in Complete Growth Medium and then induced to differentiate to chondrocytes using the Chondrocyte Differentiation Tool. Passage 3 cells, day 21 following differentiation (100X magnification), stained with Alcian Blue.

  1. Incubate the cells at 37°C with 5% CO2 for 48 hours.
  2. Carefully remove 2 mL of media from each well (leaving 1 mL) and replace with 2 mL of pre-warmed (37°C) Adipocyte Differentiation Maintenance Medium in each well.
    Important: DO NOT TILT plate during aspiration. It is important that the cell monolayer is not exposed to air during this and subsequent steps to ensure that developing lipid vesicles do not burst.
  3. Repeat Steps 6 and 7 every 3-4 days for another 11 days until adipocytes reach full maturity. (Full maturity will be reached 15 days after the beginning of initiation phase, or 17 days from initial plating of cells.)
  4. Cells can be used at any phase of adipocyte differentiation as predicated upon experimental design. To confirm lipid accumulation, cells can be fixed and stained with Oil Red O.

Additional differentiation protocols, including Chondrocyte and Osteocyte differentiation of Adipose-derived Mesenchymal Stem Cells, are available online at www.atcc.org.

Download a printer-friendly version of the ATCC Primary Cell Culture Guide

Download PDF
Blue and purple olife primary cells.

Discover ATCC Primary Cells and Needed Reagents

Download the list

References

  1. Stein GS, et al. Human Stem Cell Technology and Biology: A Research Guide and Laboratory Manual. Wiley & Sons, Hoboken, New Jersey, 2011.
  2. Zuk PA, et al. Multilineage Cells from Human Adipose Tissue: Implications for Cell-Based Therapies. Tissue Eng. 7(2):211-228), 2001.
  3. Zuk PA, et al. Human adipose tissue is a source of multipotent stem cells. Mol. Biol. Cell. 13:4279-4295, 2002.
  4. Ogawa R. The Importance of Adipose-Derived Stem Cell and Vascularized Tissue Regeneration in the Field of Tissue Transplantation. Cur. Stem Cell Res. 1:13-20, 2006.
  5. Shaeffler A & Buechler C. Concise review: adipose tissue-derived stromal cells—basic and clinical applications for novel cell-based therapies. Stem Cells 25:818-827, 2007.
  6. Kang SK, et al. Neurogenesis of Rhesus adipose stromal cells. J. Cell Sci. 117:4289-4299, 2004.
  7. Safford KM, et al. Stem cell therepy for neurologic disorders: Therapeutic potential of adipose-derived stem cells. Current Drug Targets 6:57-62, 2005.
  8. Safford KM, et al. Characterization of neuronal/glial differentiation of murine adipose-derived adult stromal cells. Exp. Neurol. 187:319-328, 2004.
  9. Kingham PJ, et al. Adipose-derived stem cells differentiate into a Schwann cell phenotype and promote neurite outgrowth in vitro. Exp. Neurol. 207:267-274, 2007.
  10. Xu, et al. Myelin-forming ability of Schwann cell-like cells induced from rat adipose-derived stem cells in vitro. Brain Res. 1239:49-55, 2008.
  11. Seo MJ, et al. Differentiation of human adipose stromal cells into hepatic lineage in vitro and in vivo. Biochem. Biophys. Res. Commun. 328:258-264, 2005.
  12. Timper K, et al. Human adipose tissue-derived mesenchymal stem cells differentiate into insulin, somatostatin, and glucagon expressing cells. Biochem. Biophys. Res. Commun. 341:1135-1140, 2006.
  13. Dominici M, et al. Minimal criteria for defining multipotent mesenchymal stromal cells: The International Society for Cellular Therapy position statement. Cytotherapy 8(4):315-317, 2006.
  14. Freshney, RI. Culture of Animal Cells: A Manual of Basic Technique, 6th Ed. John Wiley & Sons, Hoboken, New Jersey, 2010.
  15. Histology Text Atlas Book. Chapter 3: Connective Tissue. Downloaded from Visual Histology.com at http://www.visualhistology.com/products/atlas/VHA_Chpt3_Connective_Tissue.html on March 26, 2012.
  16. Elias JA, et al. Regulation of Human Lung Fibroblast Glycosaminoglycan Production by Recombinant Interferons, Tumor Necrosis Factor, and Lymphotoxin. J. Clin. Invest. 81:325-333, 1988.
  17. Rieger MM. Keratinocyte function and skin health. Cosmetics and Toiletries, July 01, 1992. Downloaded on March 26, 2012 from Access My Library at http://www. accessmylibrary.com/article/print/1G1-12484573.
  18. Bensouilah J, et. al. Aromadermatology: Aromatherapy in the Treatment and Care of Common Skin Conditions. Blackwell Publishers, 2006. Chapter 1 downloaded on March 26, 2012 at http://courses.washington.edu/bioen327/Labs/Lit_SkinStruct_Bensouillah_Ch01.pdf.

Have Questions?

Search ATCC Frequently Asked Questions for answers related to primary cells or email ATCC Technical Services for additional information.